


 English
LILYGO T-Echo
Version History:
| Version | Update date | Update description |
|---|---|---|
| T-Echo_V1.0 | Latest Version | Initial version of multi-functional LoRa communication device |
Purchase Links
| Product | MCU | LoRa | Screen | GPS | NFC | Link |
|---|---|---|---|---|---|---|
| T-Echo | nRF52840 | SX1262 | E-Paper | Supported | Supported | AliExpress |
Table of Contents
- Description
- Preview
- Modules
- Quick Start
- Pin Overview
- Related Tests
- FAQ
- Projects
- Resources
- Dependent Libraries
Description
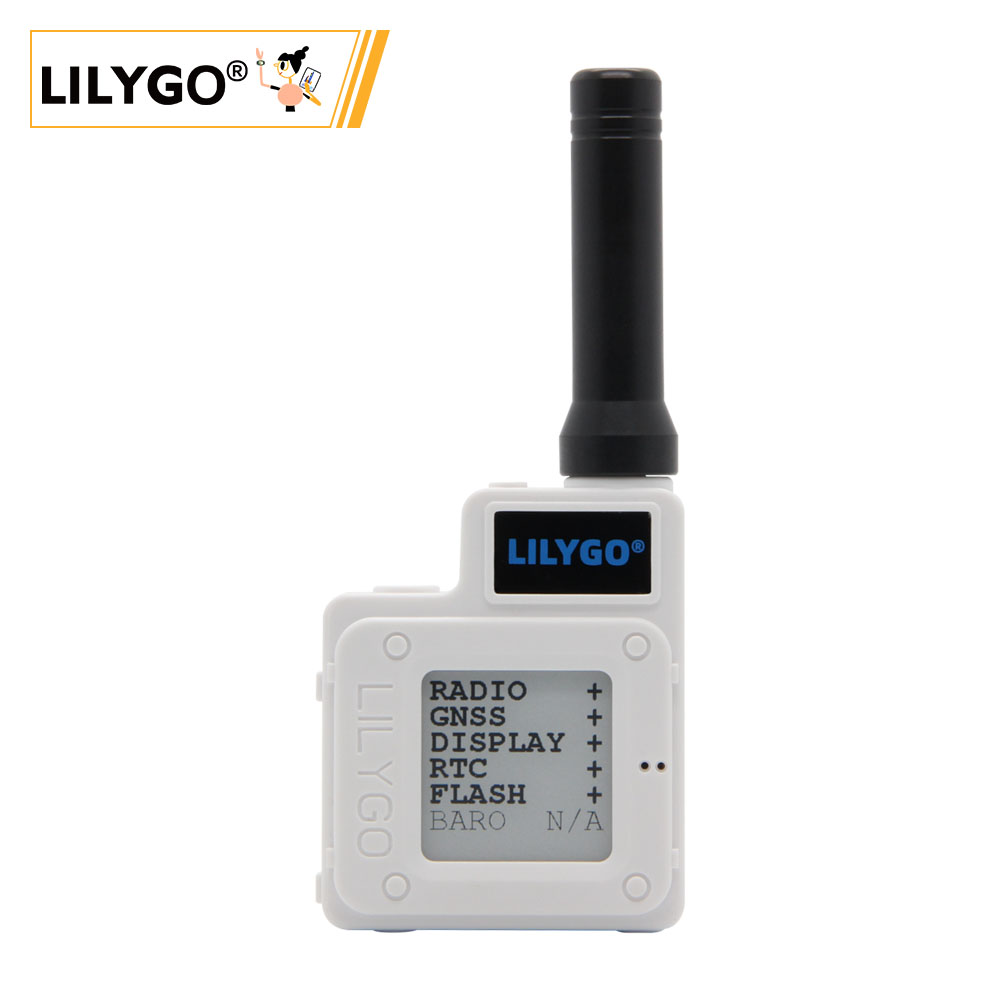
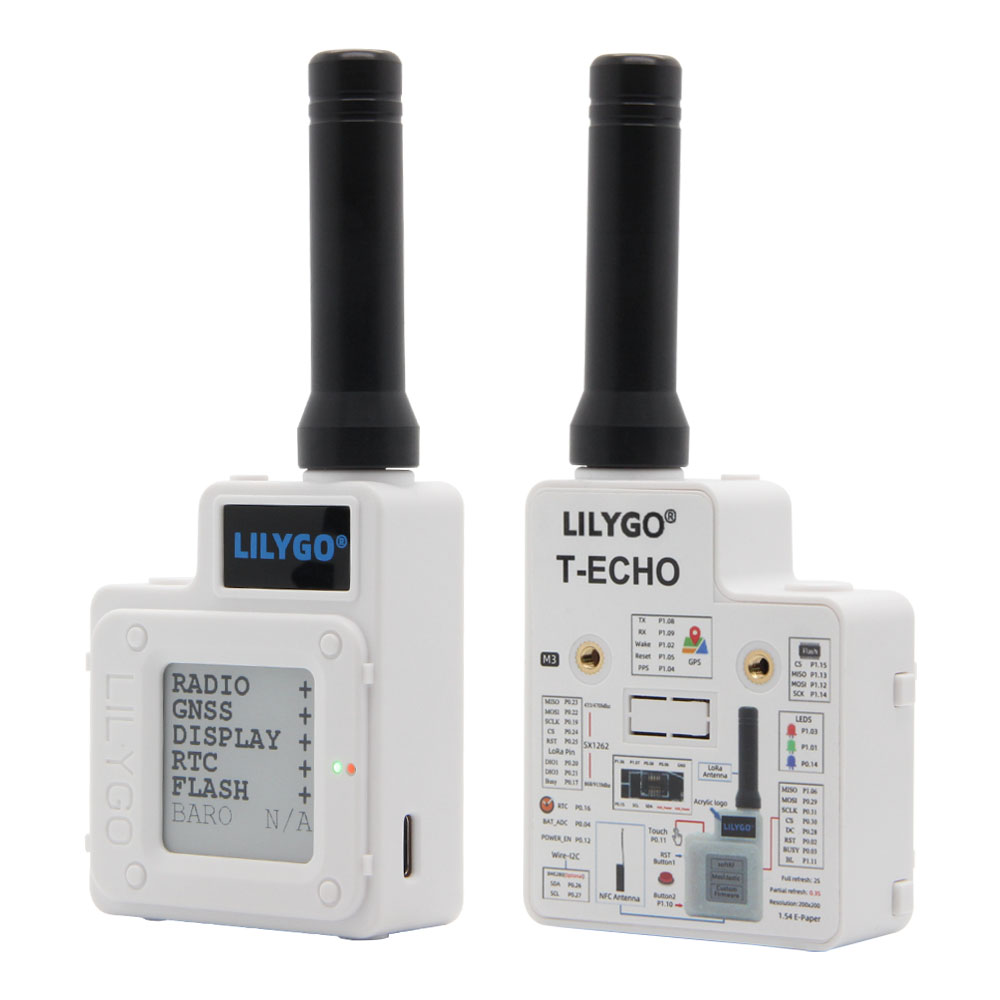
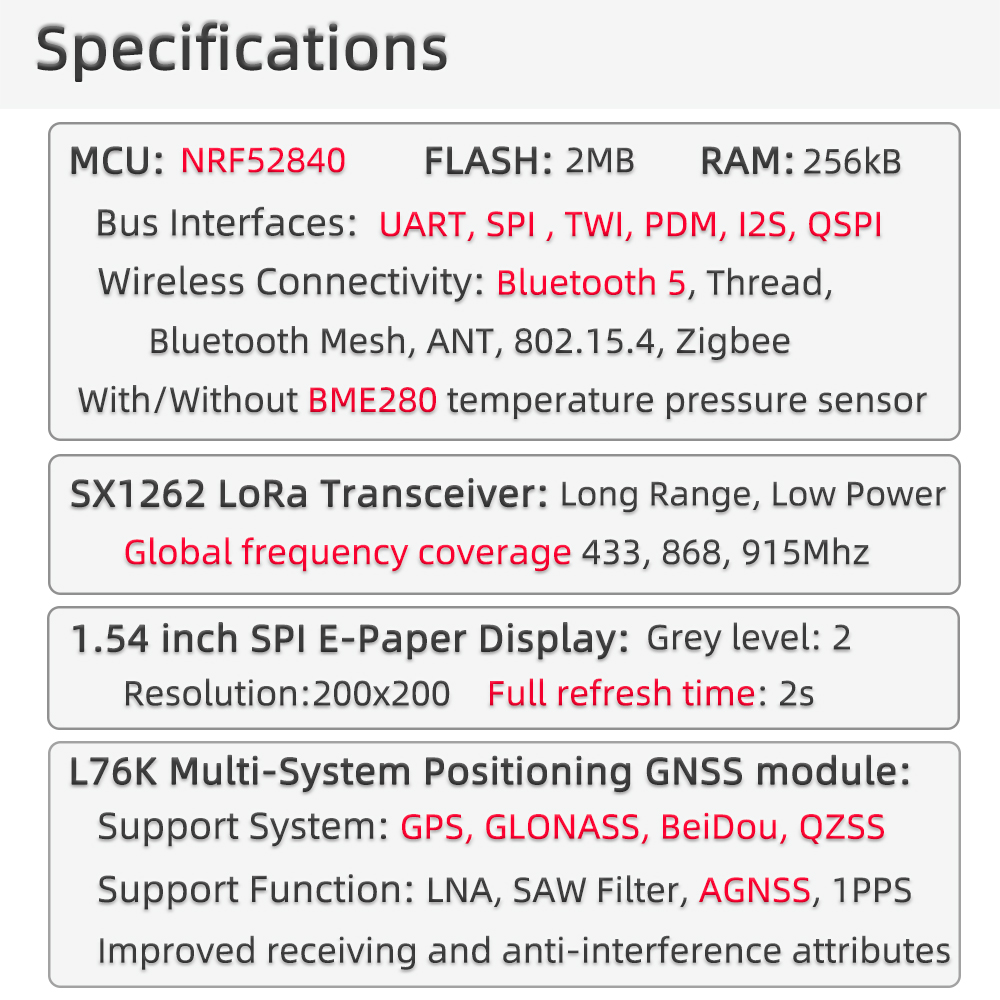
T-Echo is a multi-functional LoRa communication device based on the nRF52840 chip, integrating an E-Paper screen, GPS positioning, NFC functionality, and multiple sensors. The device supports Arduino and nRF5-SDK development environments, making it an ideal platform for developing LoRa communication, IoT nodes, and low-power applications.
T-Echo is compatible with multiple open-source firmware projects, including SoftRF and Meshtastic, and can be used to build decentralized communication networks. The device features low-power design and supports various power-saving modes, making it suitable for outdoor communication, environmental monitoring, and other application scenarios.
Preview
Physical Image
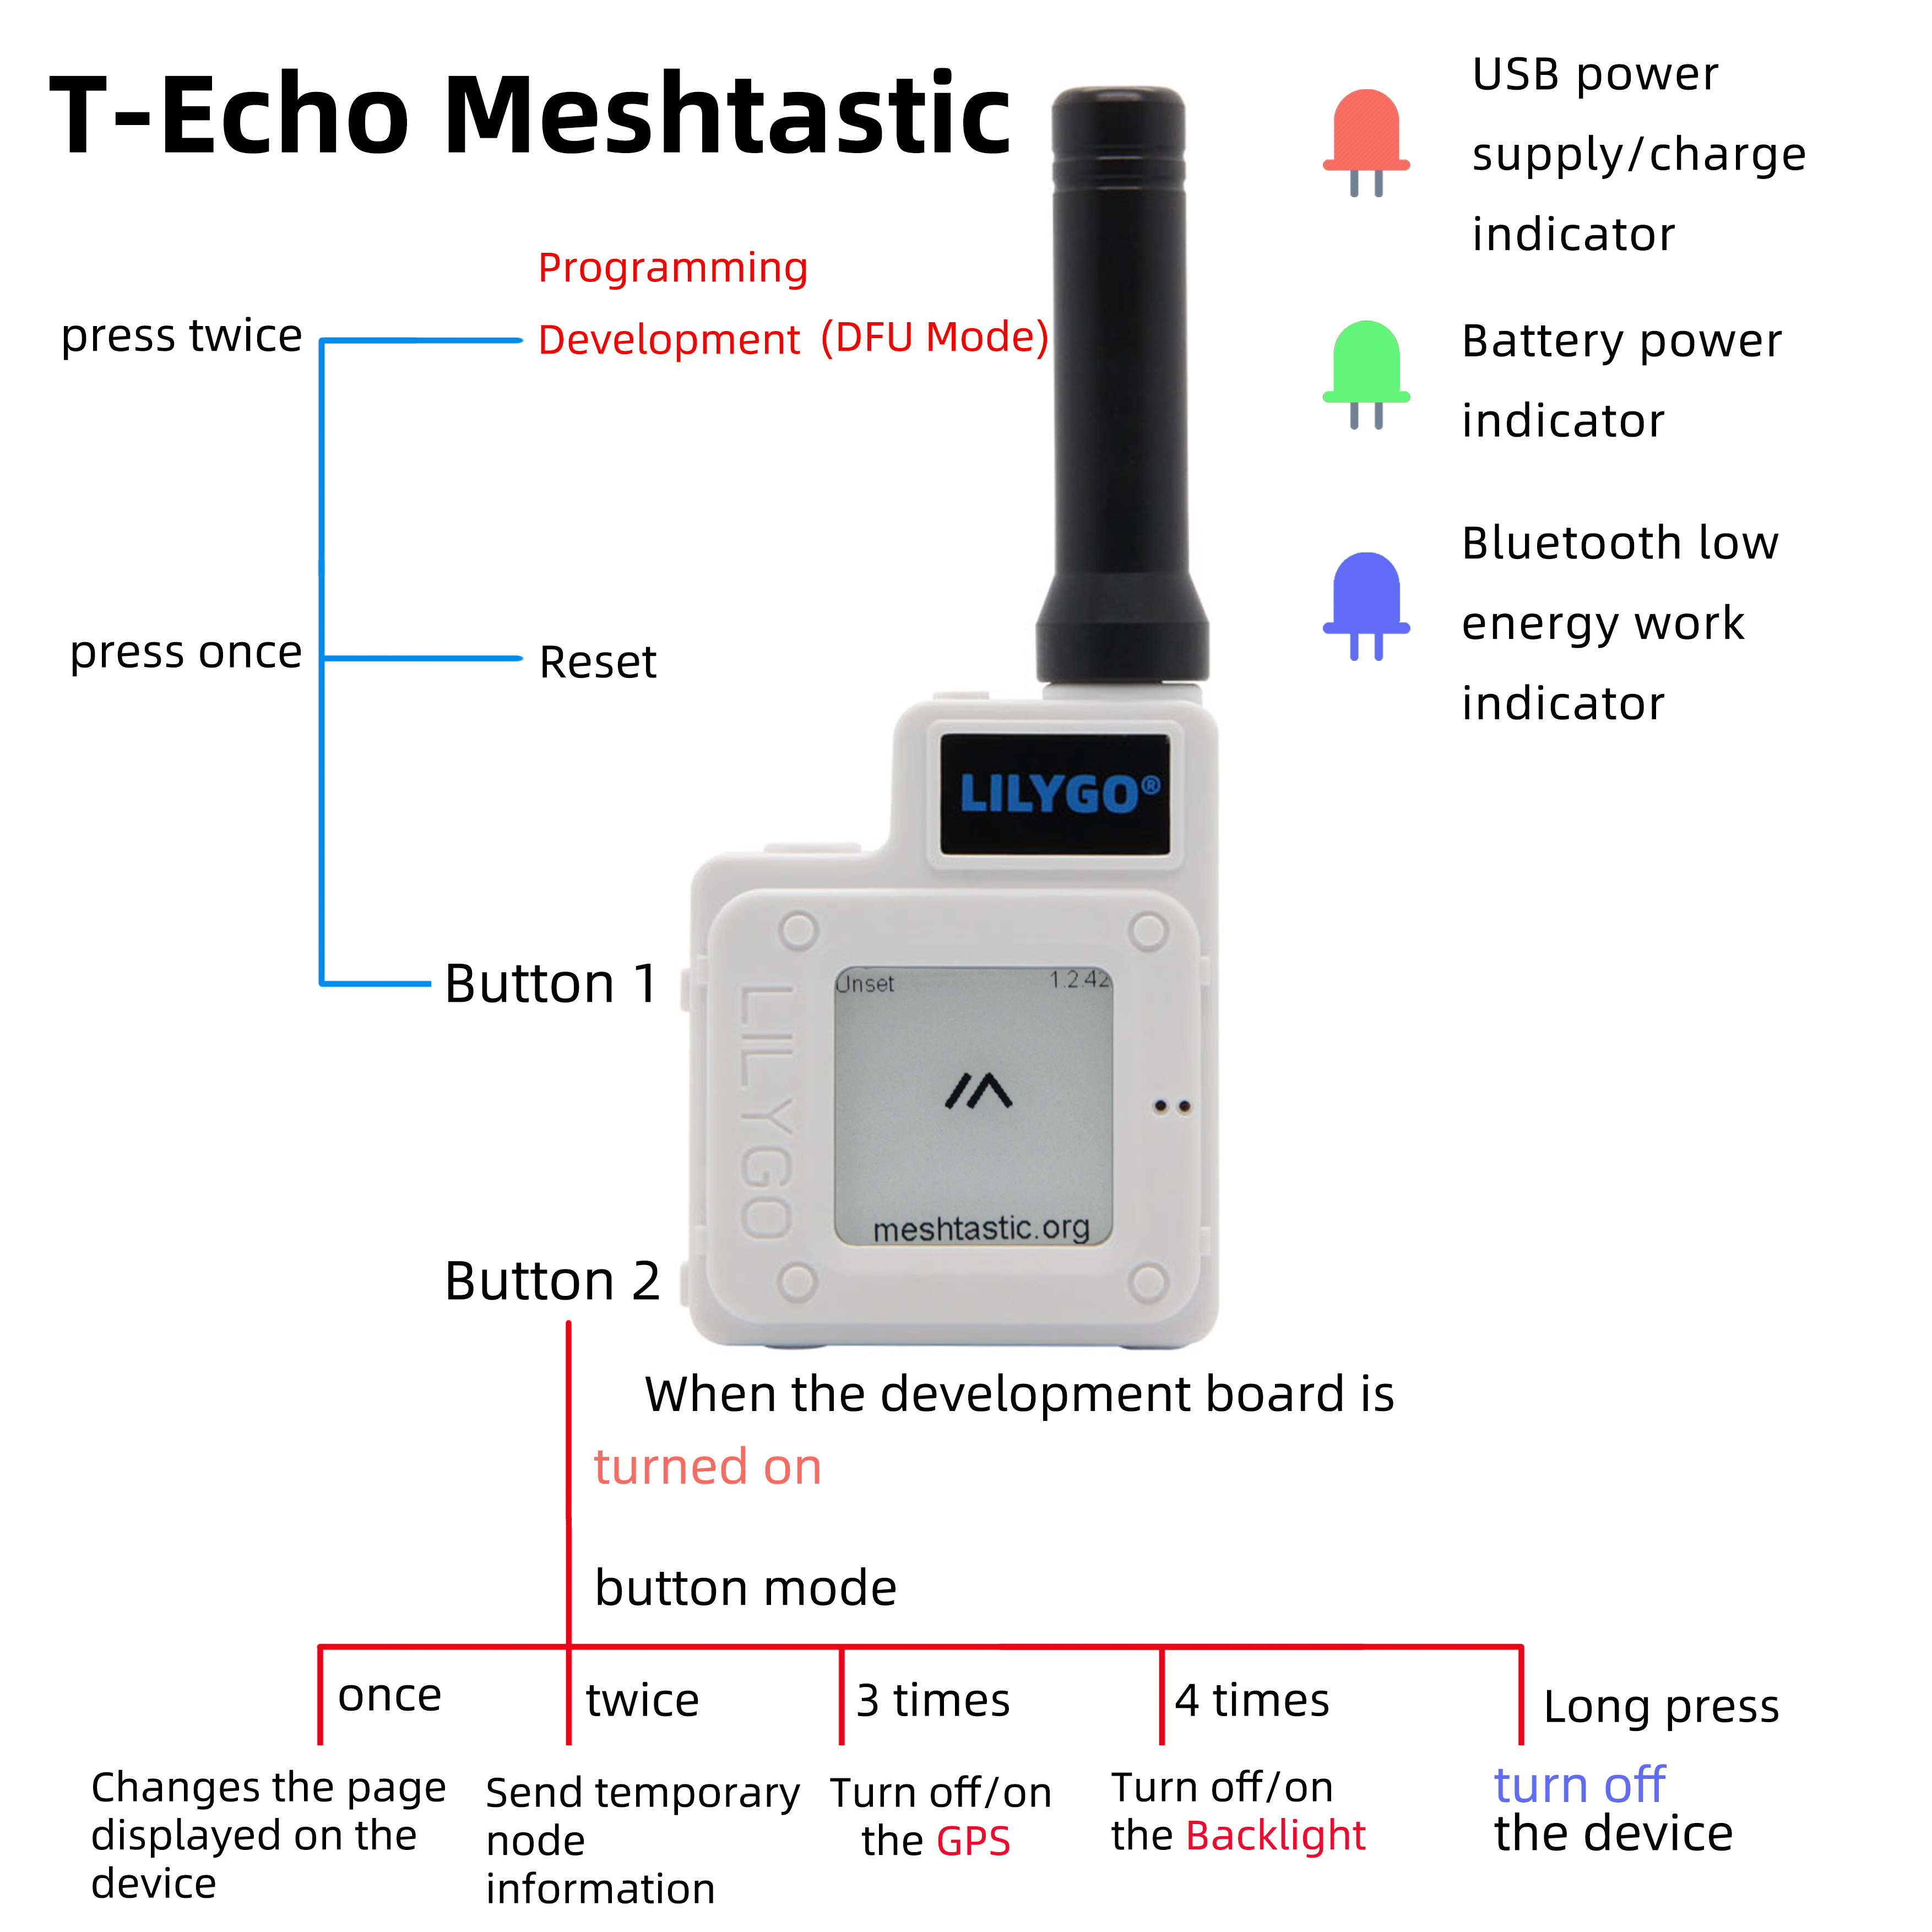
Application Examples

Modules
MCU
- Chip: nRF52840
- Architecture: ARM Cortex-M4
- Wireless: Bluetooth 5.0
- FLASH: MX25R1635FZUIL0 or ZD25WQ16B selected based on supply conditions
LoRa
- Chip: SX1262
- Frequency: Supports multiple frequency bands
- Output Power: -17 to 22 dBm
Display
- Type: E-Paper
- Feature: Low power display
GPS
- Function: Global Positioning System
NFC
- Function: Near Field Communication
Sensors
- Type: Onboard multiple sensors
Overview
| Component | Description |
|---|---|
| MCU | nRF52840 |
| LoRa | SX1262 Chip |
| Display | E-Paper Display |
| GPS | Supports positioning function |
| NFC | Supports near field communication |
| Development Environment | Arduino, nRF5-SDK |
| Open-source Firmware | SoftRF, Meshtastic compatible |
Quick Start
Example Support
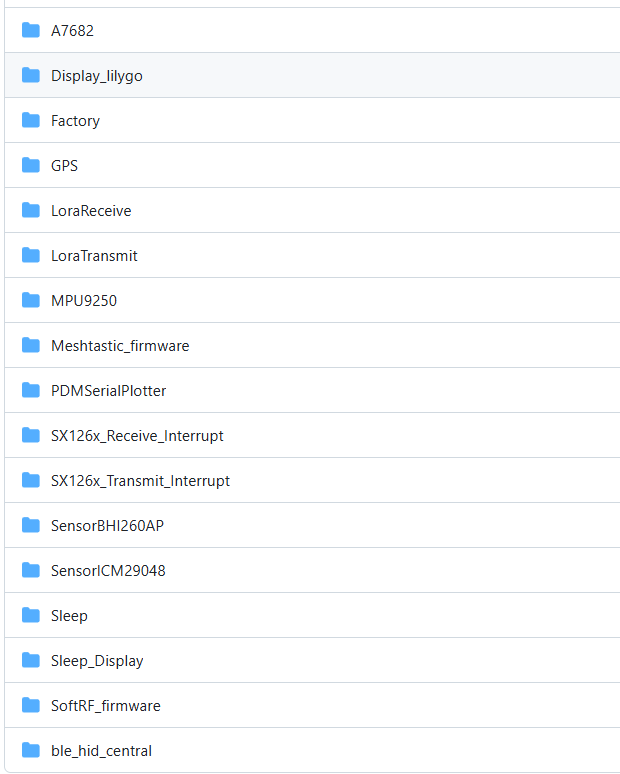
Visit the GitHub repository to view example programs
Arduino IDE Development
- Download Arduino IDE
- Open Preferences, add
https://www.adafruit.com/package_adafruit_index.jsonto the Board Manager URL list - Open the Board Manager, wait for the index to update, select 'Adafruit nRF52 by Adafruit' and click Install
- After installation is complete, select 'Nordic nRF52840 (PCA10056)' from the board list
- Copy all folders in the lib directory to the Arduino library folder
- Open the sketch, select the correct port, then click Upload
PlatformIO Development
- Install VS Code and Python
- Search for and install the PlatformIO extension in VS Code extensions
- After restarting VS Code, the PlatformIO icon will appear at the bottom left
- Click File -> Open Folder -> select the LilyGO-T-ECHO folder
- Click the √ at the bottom left to compile, → to upload
Note: When using USB to download firmware, double-click the reset button to enter DFU mode
nRF5-SDK Development
- Download nRF5-SDK
- Use nRF5-SDK for programming, supporting advanced features like NFC
Development Platforms
- Arduino IDE - Supports Adafruit nRF52
- Platform IO - Cross-platform development
- nRF5-SDK - Nordic official SDK
Pin Overview
For pin definitions, please refer to the utilities.h file.
Important Notes
Need to use files in the lib directory, which includes:
arduino-lmicAceButtonAdafruit_BME280_LibraryAdafruit_BusIOAdafruit_EPDAceButtonAdafruit-GFX-LibraryButton2GxEPDPCF8563_LibraryRadioLibSerialFlash_ID539SoftSPITinyGPSPlus
Default uses Adafruit_nRF52_Arduino, all factory boards have already flashed Adafruit_nRF52_Bootloader. If using nRF5-SDK to program the board, the original Bootloader will be lost.
If you need to use nRF5-SDK for programming, please click the link to download nRF5-SDK
NFC functionality is not supported in Adafruit_nRF52_Arduino, please use nRF5-SDK for programming.
FLASH will be selected as MX25R1635FZUIL0 or ZD25WQ16B based on supply conditions. Pay attention to the distinction during use.
After setting LoRa output power, current limit configuration is required:
// Set output power to 22 dBm (acceptable range -17 to 22 dBm)
if (radio.setOutputPower(22) == RADIOLIB_ERR_INVALID_OUTPUT_POWER) {
    Serial.println(F("Selected output power is invalid for this module!"));
    while (true);
}

// Set over-current protection limit to 80 mA (acceptable range 45 - 240 mA)
// Note: Setting to 0 disables over-current protection
if (radio.setCurrentLimit(80) == RADIOLIB_ERR_INVALID_CURRENT_LIMIT) {
    Serial.println(F("Selected current limit is invalid for this module!"));
    while (true);
}