T-Impulse Plus get it now

Overview
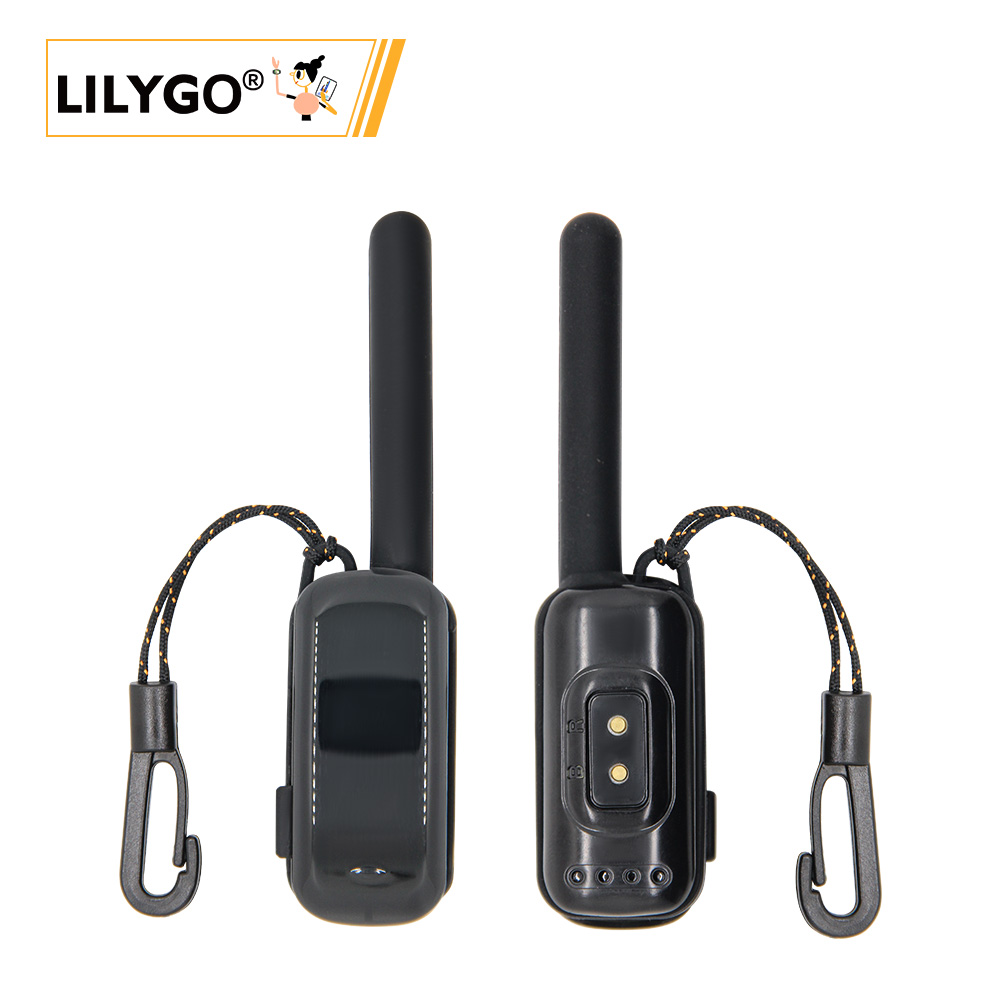
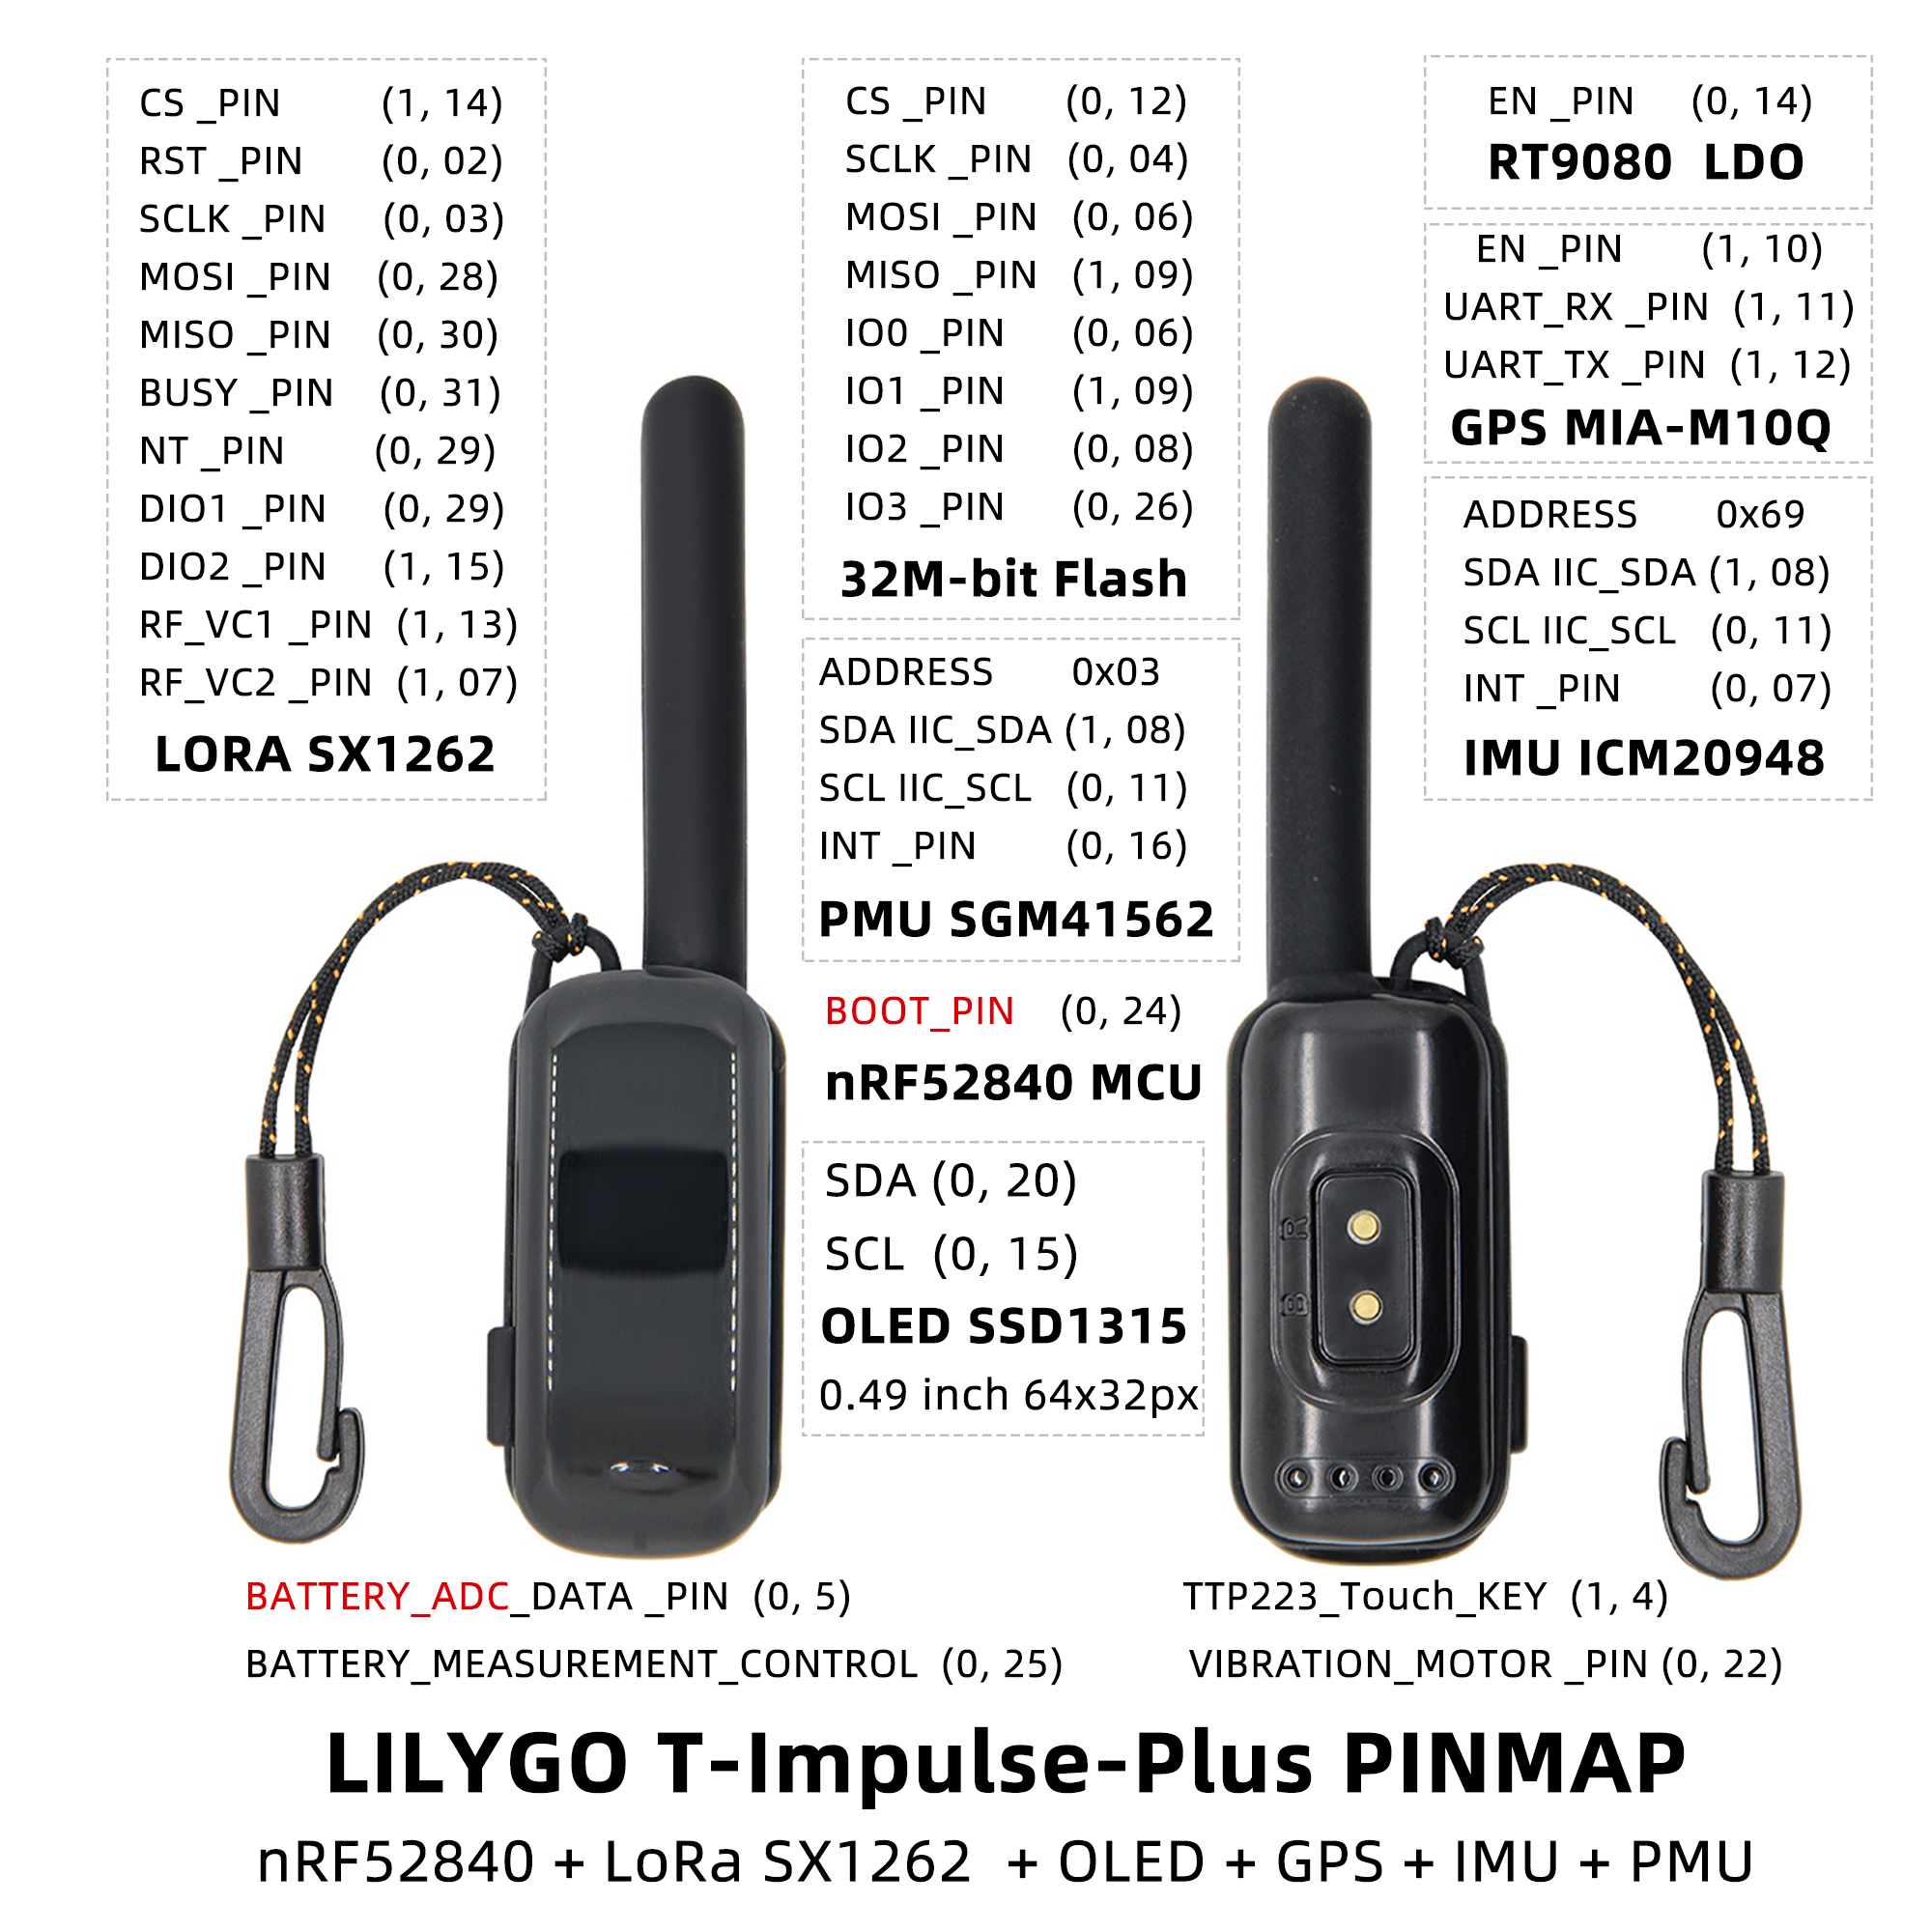
T-Impulse Plus is a low-power wristband based on the nRF52840 chip, featuring an optimized power efficiency design. Minimum deep sleep power consumption reaches 10 μA – 40 μA (actual values may vary across boards due to differences in onboard components). Shutdown power consumption is below 1 μA. The board integrates an OLED display, SX1262 LoRa module, MIA-M10Q GPS, ICM20948 IMU, SPI Flash, and TTP223 capacitive touch button. Suitable for low-power wearable IoT applications.
Quick Start
Example Support
| Example | Arduino / PlatformIO | Description |
|---|---|---|
| original_test | ✓ | Factory test program |
| Battery_Measurement | ✓ | Battery voltage measurement |
| BLE_Uart | ✓ | BLE UART communication |
| Display | ✓ | OLED display test |
| Display_GPS_BLE_Uart | ✓ | Display + GPS + BLE combined |
| Flash | ✓ | SPI Flash read/write |
| Flash_Erase | ✓ | SPI Flash erase |
| Flash_Speed_Test | ✓ | SPI Flash speed test |
| GPS | ✓ | GPS basic example |
| gps_2 | ✓ | GPS example variant |
| GPS_Full | ✓ | GPS full-featured example |
| ICM20948 | ✓ | IMU sensor test |
| IIC_Scan_2 | ✓ | I²C bus scan |
| sgm41562 | ✓ | Power management IC test |
| SX126x_PingPong | ✓ | LoRa ping-pong test |
| SX126x_PingPong_2 | ✓ | LoRa ping-pong test (variant) |
| sx126x_tx_continuous_wave | ✓ | LoRa continuous wave TX |
| ttp223 | ✓ | Touch button test |
PlatformIO
- Install Visual Studio Code and the PlatformIO IDE extension
- Clone the T-Impulse-Plus repository and open it in VS Code
- Open
platformio.ini, uncomment the desired example under[platformio] - Click ✓ to compile, click → to upload
- If you encounter an error during first setup, open
tool/win10 vscode platformio start/and runpython t_impulse_plus_setup.pyto complete board installation
Arduino
- Install Arduino IDE
- In Preferences, add the Adafruit board URL:
https://www.adafruit.com/package_adafruit_index.json - In Board Manager, search for
Adafruit_nRF52and install the Adafruit package - Copy all folders from the project
libraries/to your Arduino libraries folder - Select board settings:
| Arduino IDE Setting | Value |
|---|---|
| Board | Nordic nRF52840 DK |
- Enter bootloader download mode: Press and release RST, wait 1 second, then press and release RST again. A new drive letter will appear on the computer.
- Click → to upload
JLINK Flashing
- Install nRF Connect for Desktop and JLINK
- Connect JLINK pins correctly
- Open nRF Connect → Programmer tool
- Add bootloader + firmware files, click Erase & Write
Development Platforms
Video
Key Features
- nRF52840 ARM Cortex-M4 @ 64 MHz, 1 MB Flash, 256 kB RAM, Bluetooth 5.0 LE
- SX1262 LoRa (S62F module, SPI)
- MIA-M10Q GNSS (UART)
- SSD1315 OLED display, 64 × 32 px (I²C)
- ICM20948 9-axis IMU (I²C)
- ZD25WQ32CEIGR 4 MB SPI Flash
- TTP223 capacitive touch button
- SGM41562 power management IC
- Deep sleep: 10–40 μA; shutdown: < 1 μA
Product Parameters
| Parameter | Value |
|---|---|
| MCU | nRF52840 |
| RAM | 256 kB |
| Flash (MCU) | 1 MB |
| Flash (External) | 4 MB (ZD25WQ32CEIGR, SPI) |
| Bluetooth | Bluetooth 5.0 LE |
| LoRa | SX1262 (S62F module) |
| GPS | MIA-M10Q GNSS |
| Display | SSD1315 OLED, 64 × 32 px |
| IMU | ICM20948 (9-axis) |
| Touch | TTP223 capacitive button |
| PMU | SGM41562 |
| Deep Sleep Current | 10–40 μA |
| Shutdown Current | < 1 μA |
Pin Diagram
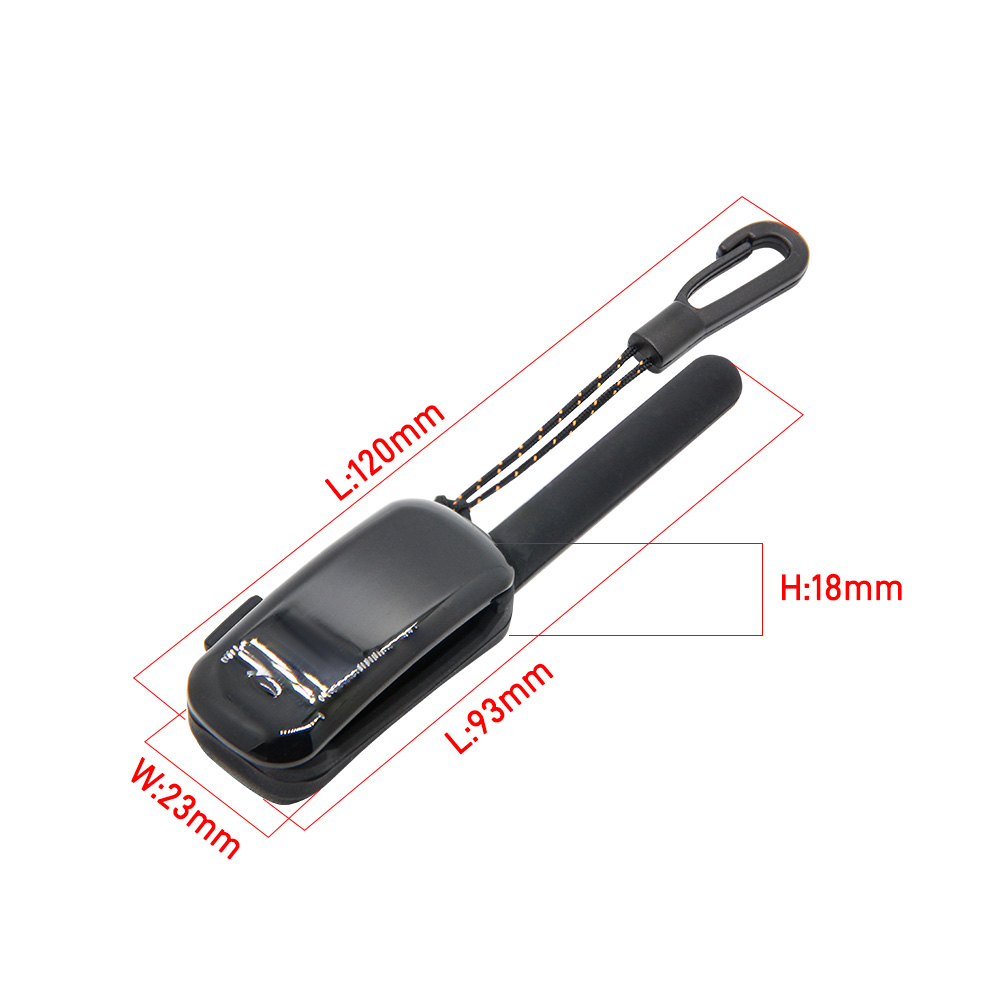
Dimensions
Schematic
Datasheet
Software Libraries
Dependent Libraries
FAQ
Q. How do I enter bootloader download mode? A. Press and release RST, wait 1 second, then press and release RST again. A new drive letter will appear on the computer indicating the device is in bootloader mode.
Q. Why is there no debug output from USB? A. Enable the DTR option in your serial monitor software.
Q. Arduino IDE prompts to upgrade libraries — should I? A. Do not upgrade. Different library versions may be incompatible; stay with the versions in the
librariesdirectory.Q. Still don't know how to set up the programming environment? A. Refer to LilyGo-Document for additional setup instructions.
Version History
| Version | Release Date | Update Description |
|---|---|---|
| T-Impulse-Plus V1.0 | 2025-06-18 | Initial release |