
T-Display P4 Quick Start
Overview
T-Display P4 is based on the Espressif ESP32-P4 high-performance application processor. Development uses the ESP-IDF SDK.
Firmware Download and Flashing Notes
When using LILYGO Spark, you do not need to download .bin files manually from GitHub. Use the built-in Firmware Download tool to search for T-Display P4, download the required firmware, and flash it directly. Download firmware from T-Display-P4 GitHub Releases only when flashing manually with another tool.
T-Display P4 has an ESP32-P4 main processor and an ESP32-C6 wireless coprocessor. Confirm the target chip before flashing to avoid writing firmware to the wrong chip.
USB-C port note: For ESP32-P4 main firmware flashing, serial terminal access, or data transfer, connect the right-side USB-C port labeled
P4.U. The left-side USB-C port is for charging / power only and is not used for firmware flashing or data transfer. Disable RTS / hardware flow control in serial terminal software; the RTS line may reset the P4 and cause the device to hang.
Flash ESP32-P4 Main Firmware
If you only need to restore the factory firmware, run official examples, or flash main applications such as LilygoBox, you usually only need to flash the ESP32-P4:
- Open LILYGO Spark, then go to the Firmware Download tool.
- Search for and select T-Display P4, then download the required ESP32-P4 firmware in Spark. There is no need to download it manually from GitHub.
- Connect T-Display P4 through the right-side
P4.UUSB-C port, then select the device's ESP32-P4 port. - Start flashing. After flashing completes, press RST or power-cycle the board.
If the board cannot enter download mode, hold BOOT, press and release RST, then release BOOT and start flashing again.
Flash ESP32-C6 Coprocessor Firmware
ESP32-C6 is used for wireless functions such as Wi-Fi / Bluetooth. The coprocessor firmware cannot be flashed as ESP32-P4 main firmware. The following steps use the LILYGO Spark Firmware Download tool, in this order: P4 preparation firmware → C6 coprocessor firmware → P4 factory firmware:
In Spark's Firmware Download tool, select the T-Display P4 firmware series, find
[T-Display-P4][coprocessor_download_mode], and click download. After it is downloaded, select the device's ESP32-P4 port and flash it. This prepares the ESP32-C6 for download mode.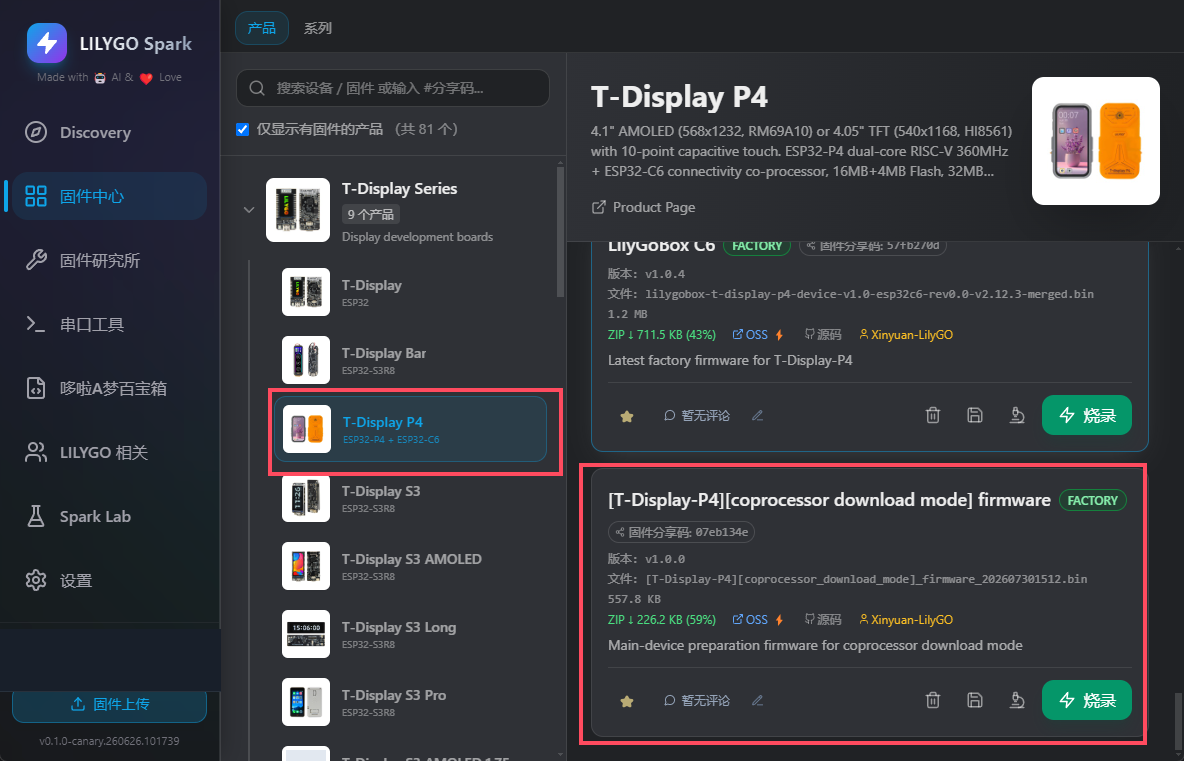
After
coprocessor_download_modeis flashed, click delete on the downloaded firmware, then download the next firmware.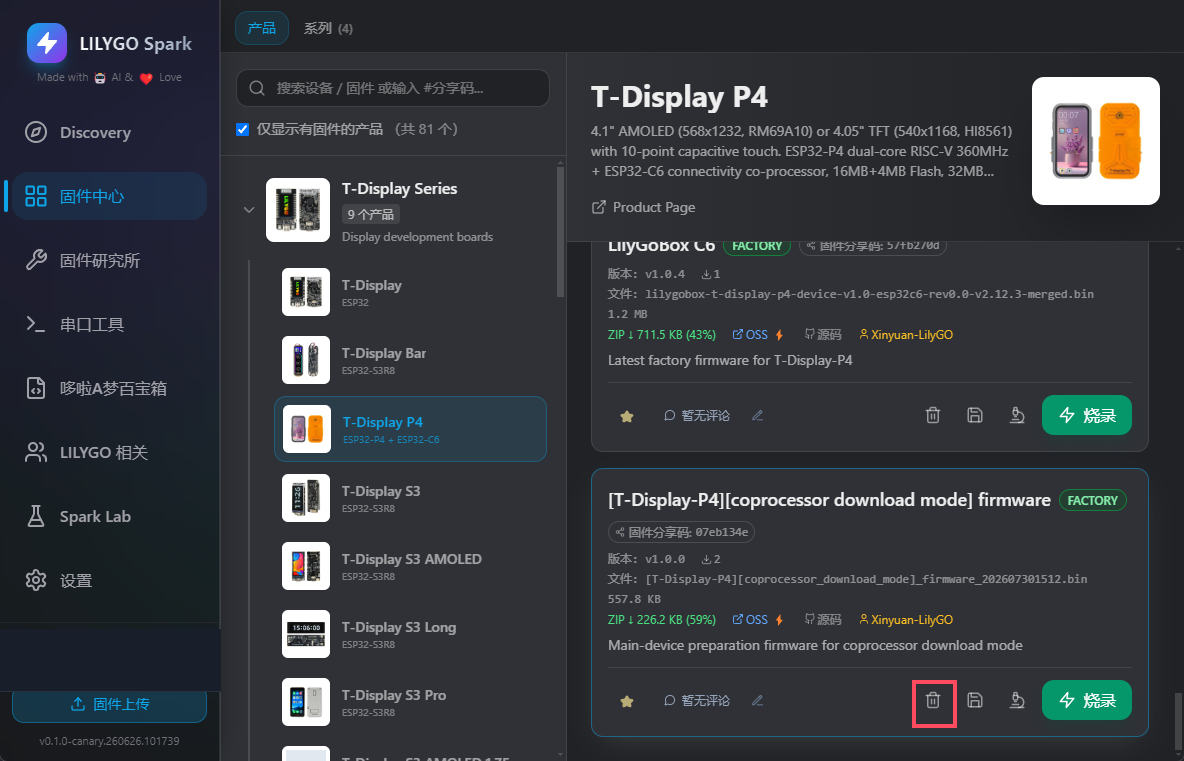
In Spark's Firmware Download tool, select
lilygobox-t-display-p4-device-v1.0-esp32c6-rev0.0-v2.12.3-merged.binas the ESP32-C6 coprocessor firmware.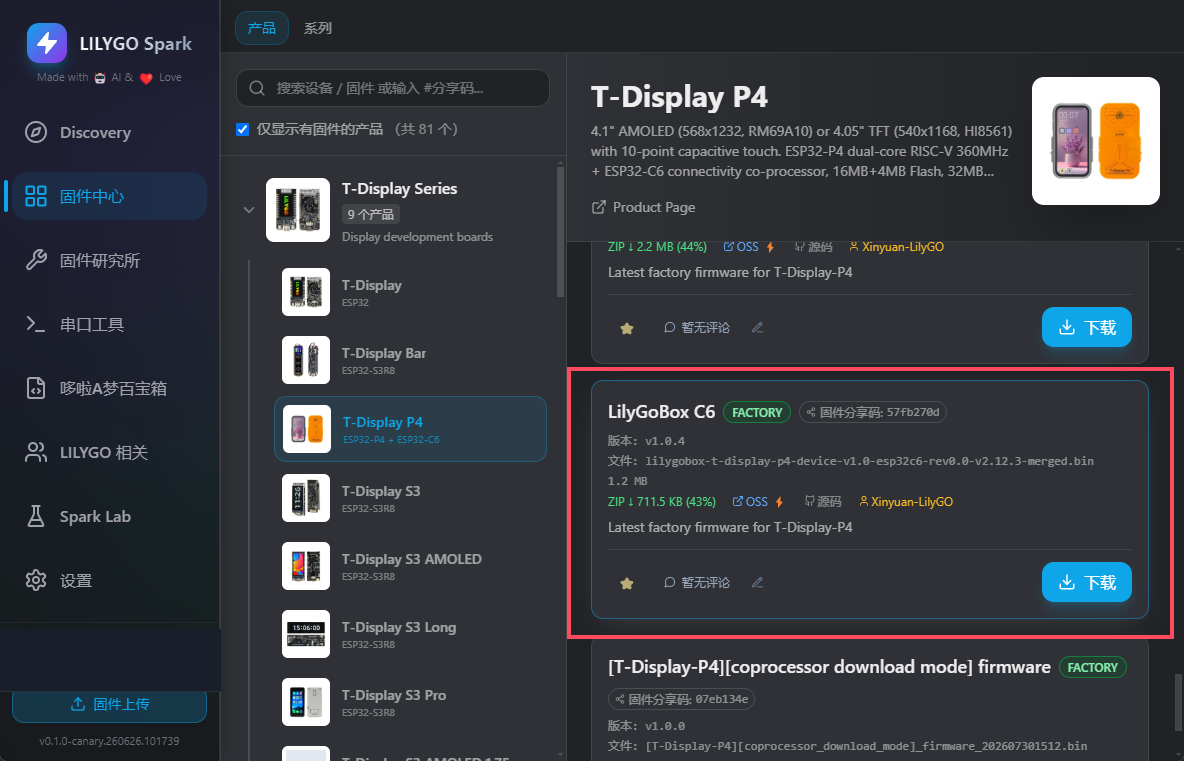
Connect the 3.3V USB-TTL serial downloader to the device's C6 UART connector. The connector pin order is
RX-TX-3.3V-GND. Wire boardRXto USB-TTLTX, boardTXto USB-TTLRX, andGNDtoGND.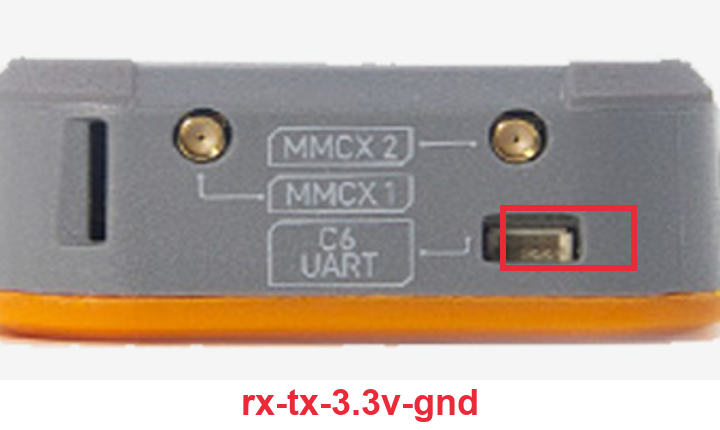
In the flashing dialog, select the USB-TTL serial downloader port that corresponds to the device's ESP32-C6, then start flashing.
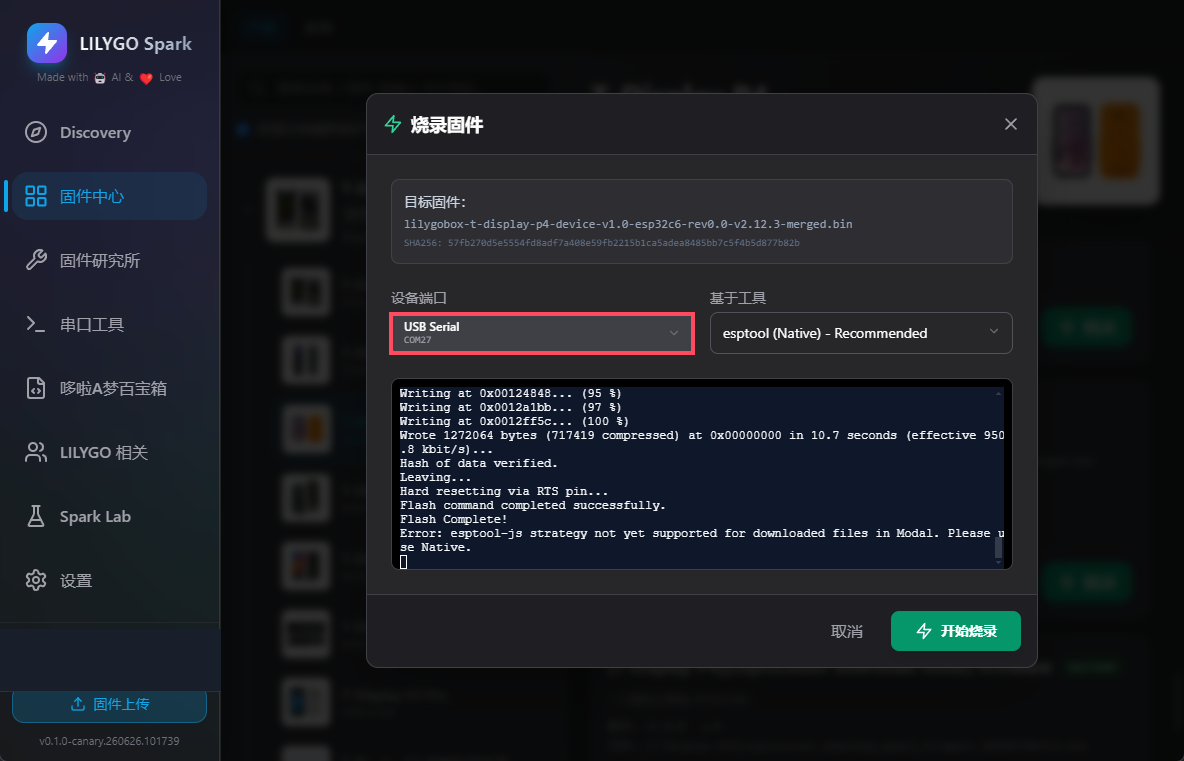
After the ESP32-C6 firmware is flashed, click delete on the downloaded C6 firmware, then download the next firmware.
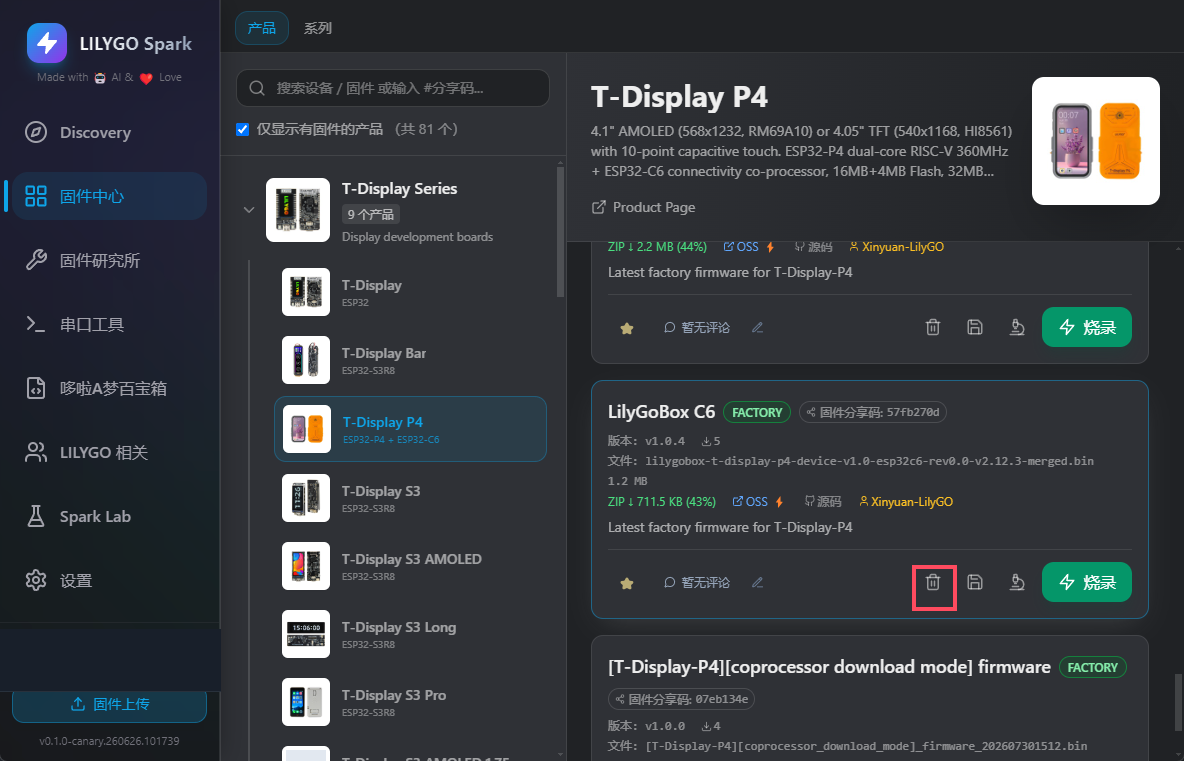
In Spark's Firmware Download tool, select
lilygobox-t-display-p4-device-v1.0-esp32p4-rev1.0-v1.0.4-merged.binas the ESP32-P4 factory firmware.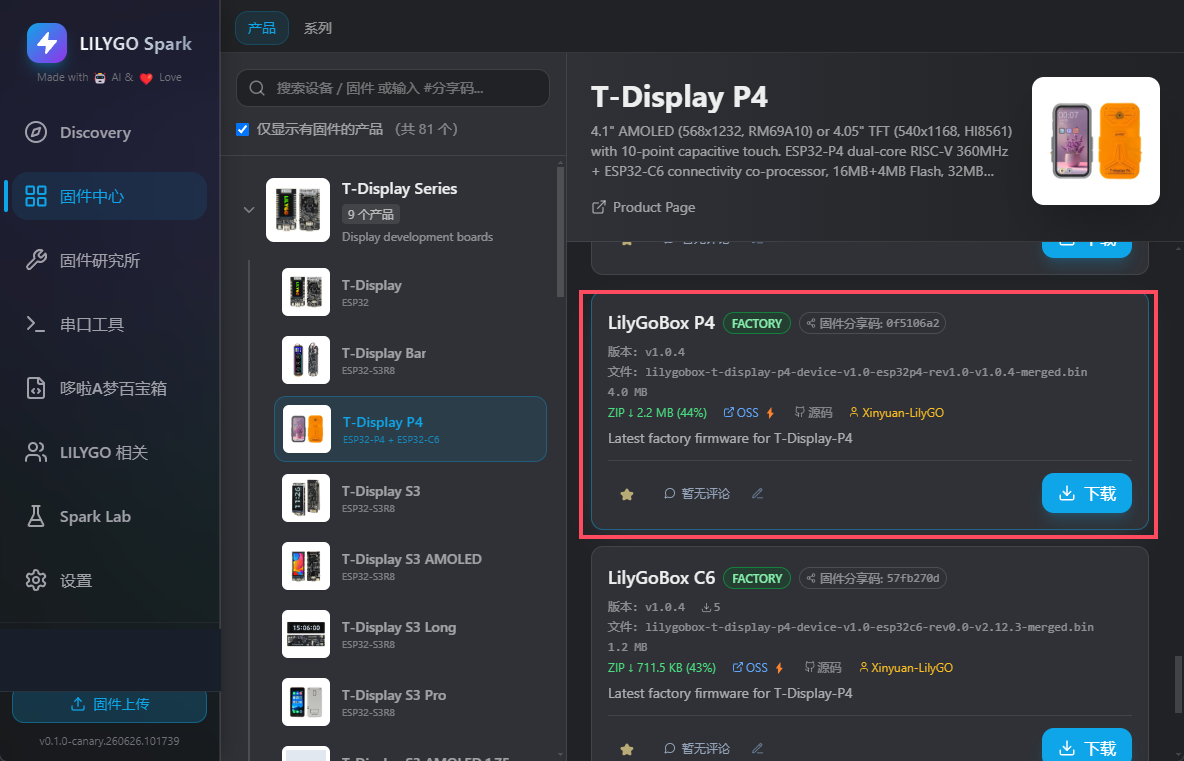
In the flashing dialog, select the USB port that corresponds to the device's ESP32-P4, then start flashing.
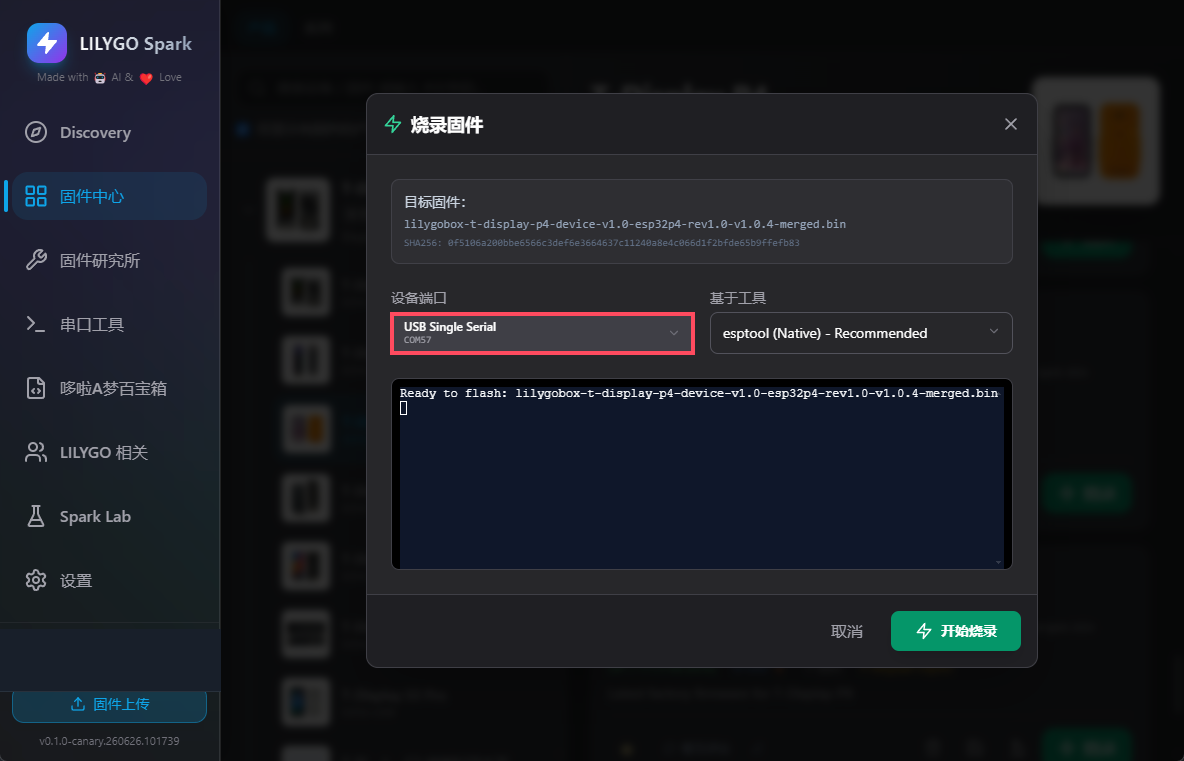
Note: ESP32-P4 main firmware and ESP32-C6 coprocessor firmware are not interchangeable. Select ESP32-P4 for main firmware, and ESP32-C6 for coprocessor firmware. It is recommended to finish flashing the ESP32-C6 coprocessor firmware first, then flash the ESP32-P4 main processor back to the factory firmware or normal application firmware.
ESP-IDF Setup
- Install ESP-IDF for ESP32-P4
- Clone the repository:bash
git clone https://github.com/Xinyuan-LilyGO/T-Display-P4.git - Navigate to the example directory and build:bash
idf.py set-target esp32p4
idf.py build flash monitor
Arduino
Arduino IDE (Experimental)
Arduino ESP32 support for ESP32-P4 is experimental. Check Arduino ESP32 releases for the latest P4 support status.
Development Platforms
FAQ
Q: Can I use Arduino IDE?
A: Arduino support for ESP32-P4 is still experimental. ESP-IDF is the recommended development platform.
Q: Upload keeps failing?
A: Hold BOOT, press and release RST, then release BOOT to enter download mode.
Q: The device resets or hangs after opening a serial terminal?
A: Make sure you are connected to the right-side P4.U data port, and disable RTS / hardware flow control in the serial terminal program.