T5-4.7 E-Paper S3 Pro get it now
Overview
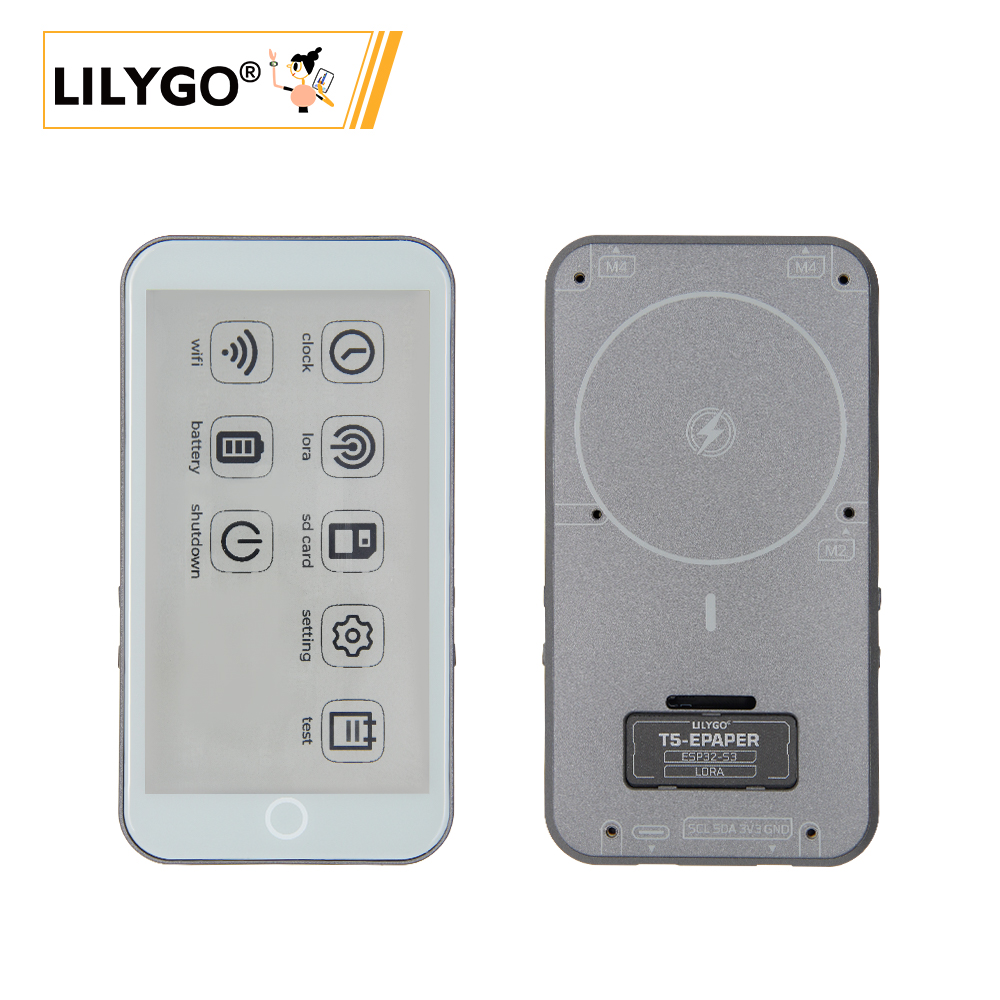
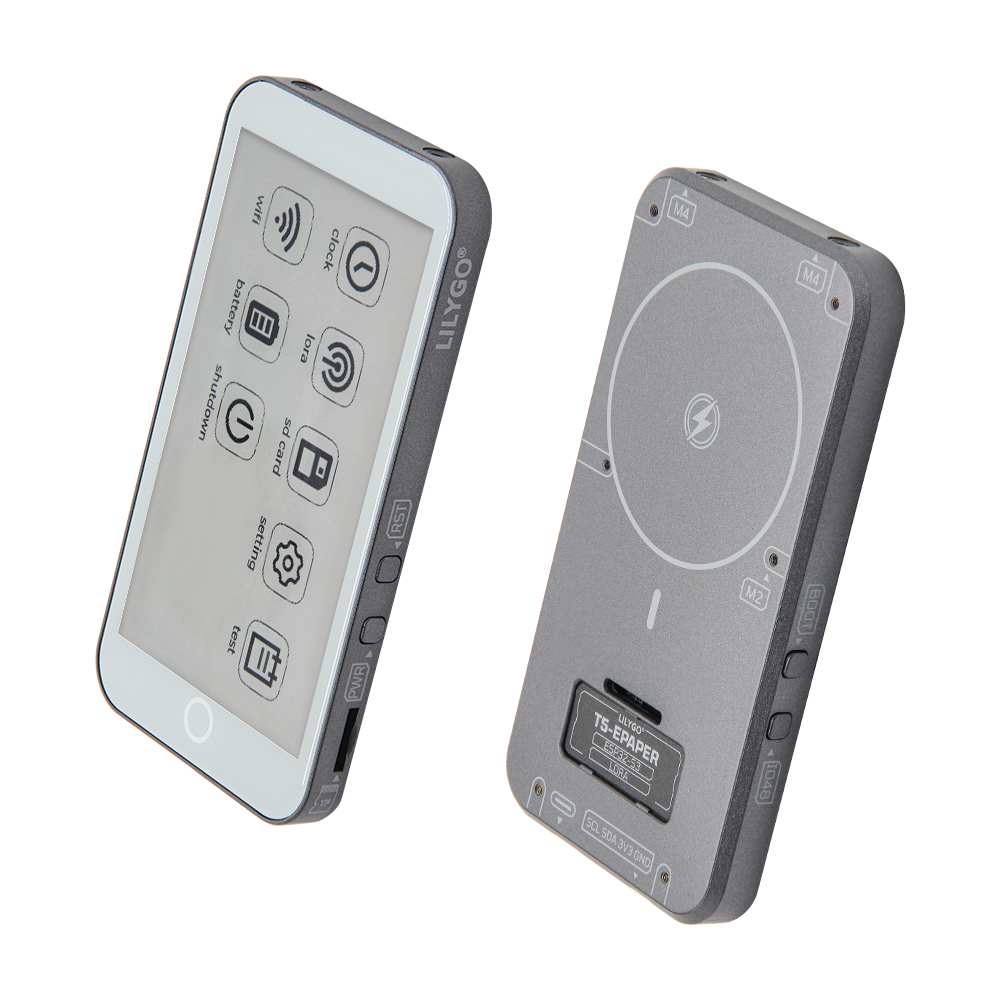
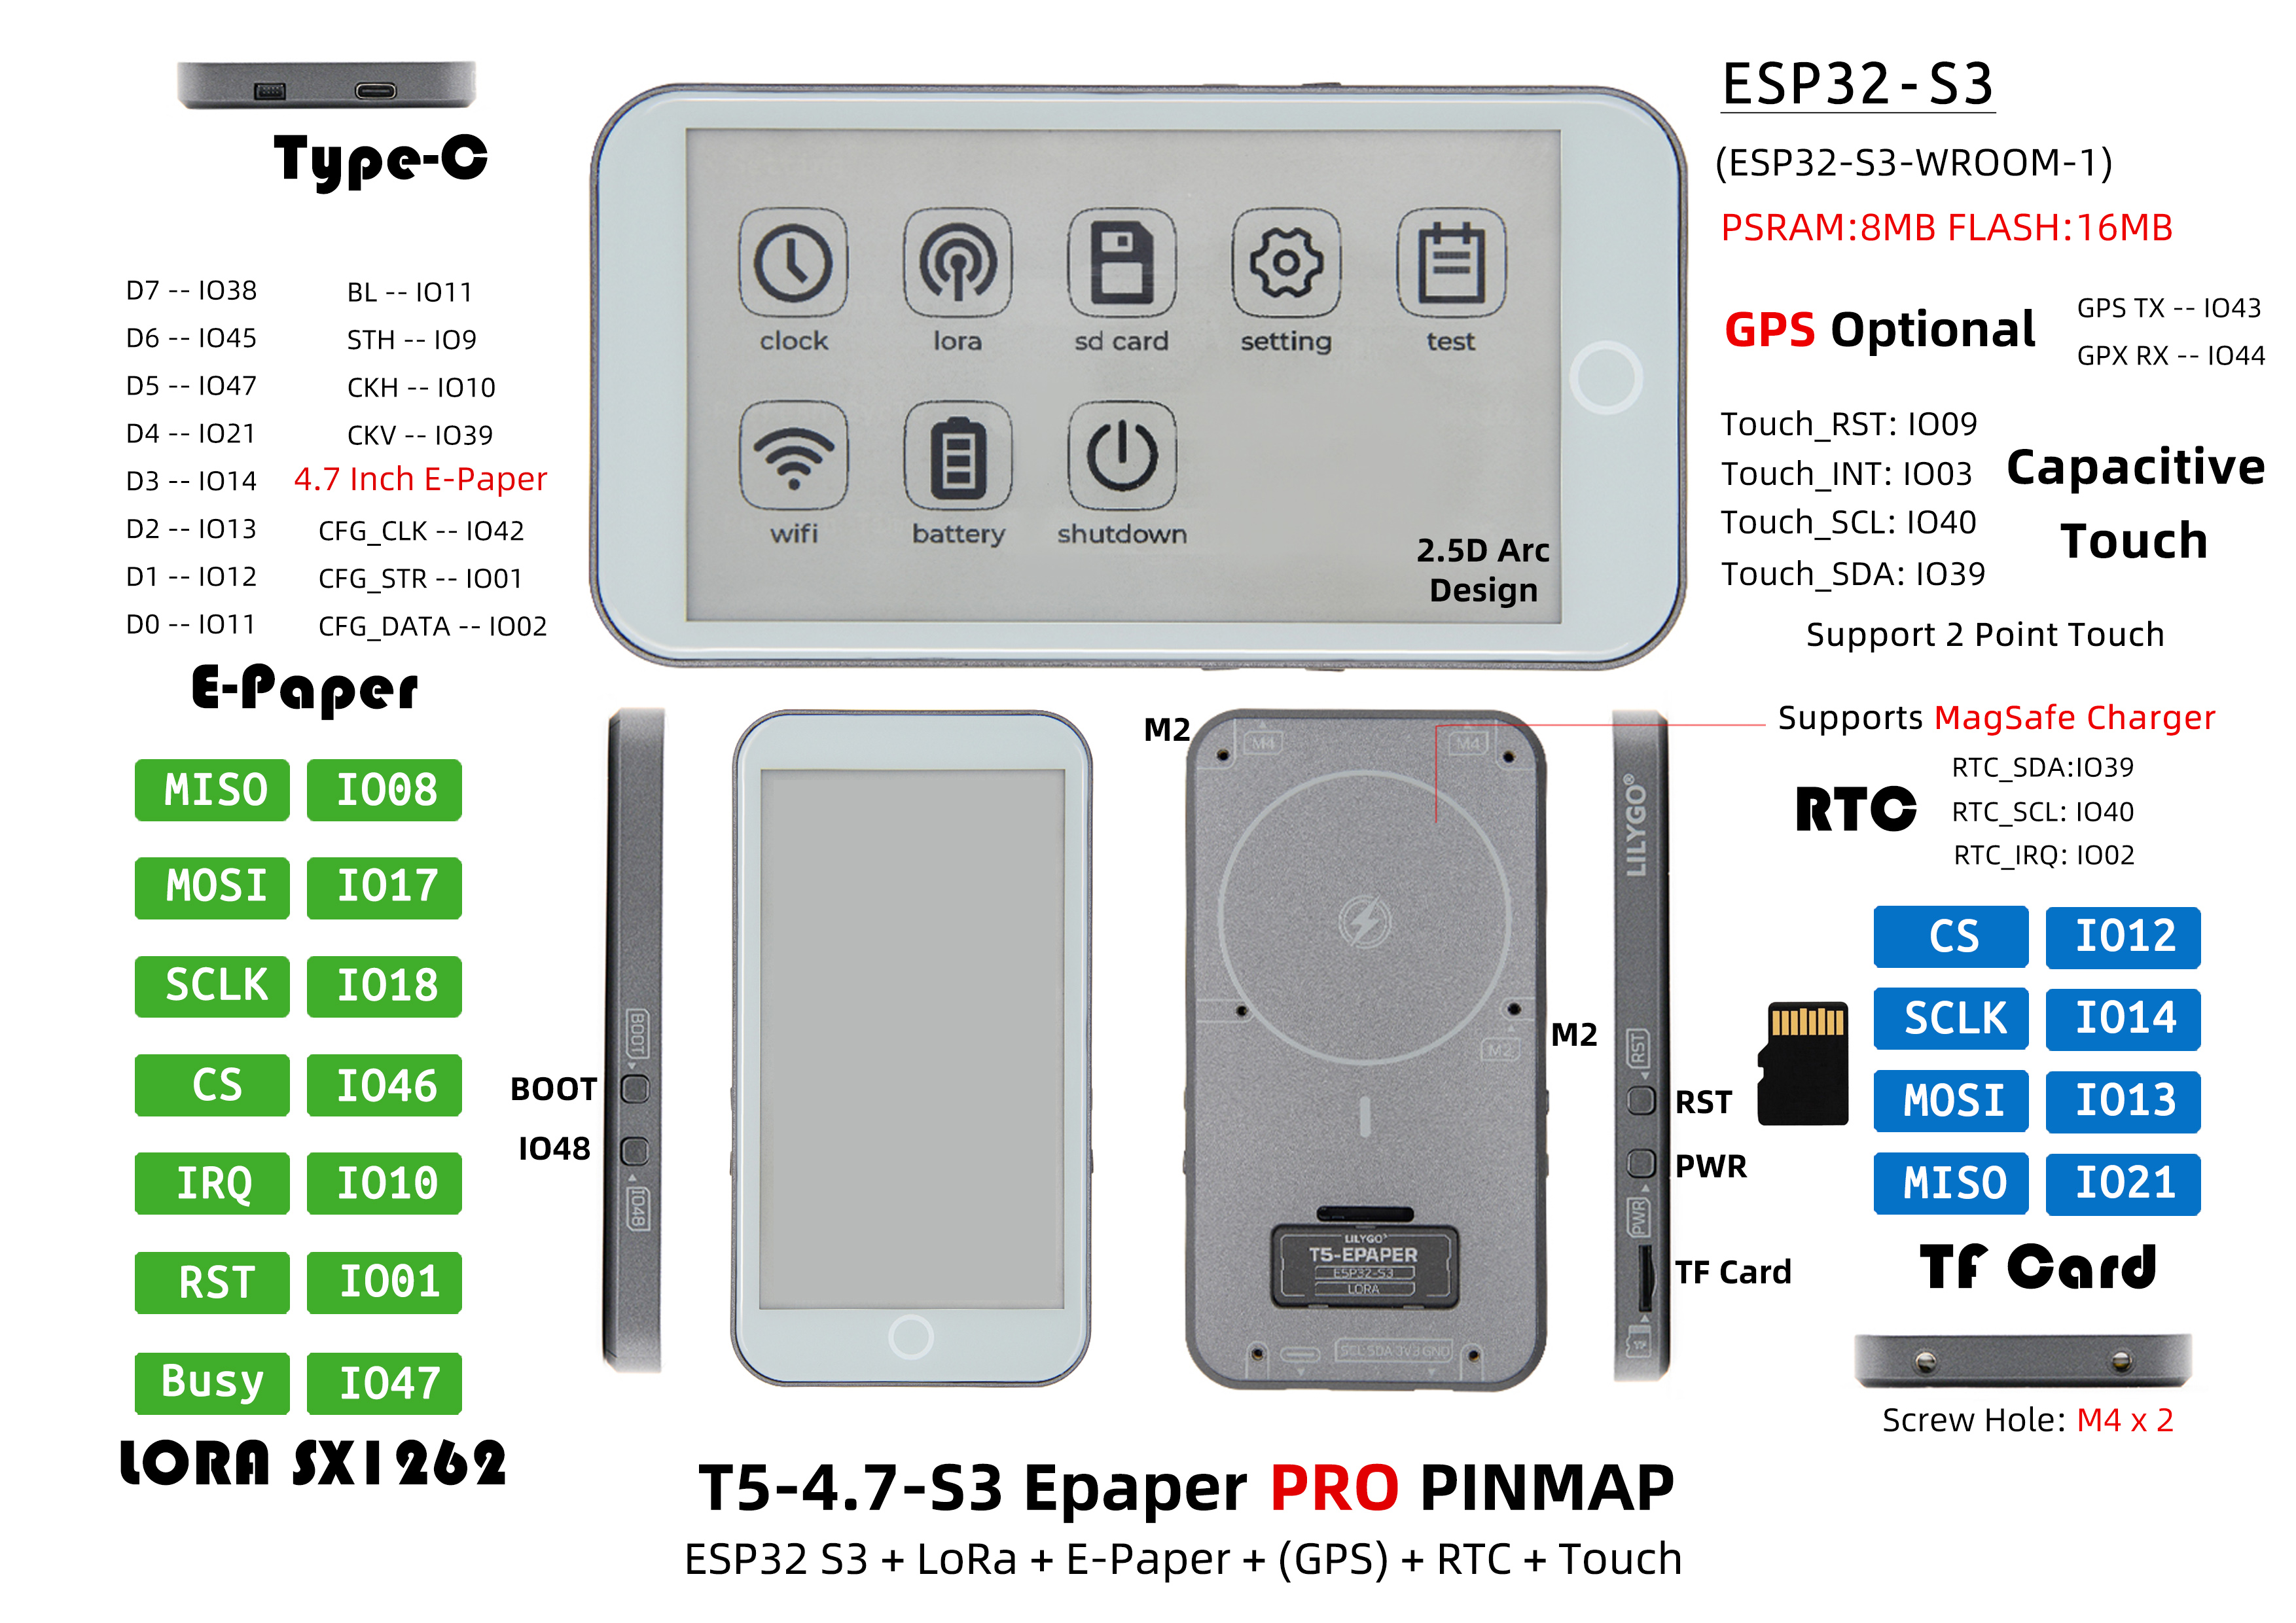
T5-4.7-S3 E-Paper PRO is a multifunctional IoT device based on ESP32-S3-WROOM-1 (16 MB Flash, 8 MB PSRAM), integrating a 4.7-inch ED047TC1 E-Ink display (960 × 540, 16-level grayscale) with TPS65185 power driver, SX1262 LoRa (433–915 MHz), MIA-M10Q GPS, GT911 capacitive touchscreen (two-point), PCF85063 RTC, BQ25896/BQ27220 battery management, MagSafe magnetic charging, TF card, and 2 × QWIIC. Version H752-01 adds partial refresh support and adjustable Vcom voltage. Suitable for electronic labels, remote monitoring, and outdoor navigation.
Quick Start
Example Support
| Example | PlatformIO/Arduino | ESP-IDF | Description |
|---|---|---|---|
| T5S3-4.7-e-paper-PRO | ✓ | E-Ink display, LoRa, GPS, touch, RTC, battery examples |
Available examples
| Example | Description |
|---|---|
| bq25896 | Battery charging chip test |
| bq27220 | Battery fuel gauge test |
| display_test | E-Ink display test |
| factory | Factory firmware |
| GPS | GPS test (requires outdoor use) |
| io_extend | IO expansion chip test |
| lora_recv / lora_send | SX1262 LoRa transmit/receive |
| lvgl_test | LVGL graphics test |
| rtc_pcf8563 | RTC test |
| sd_card | SD card read/write |
| touch | GT911 touch test |
PlatformIO
- Install Visual Studio Code and Python
- Search for and install the PlatformIO IDE extension in VS Code
- Open the
T5S3-4.7-e-paper-PROproject folder - Open
platformio.ini, uncomment the example under[platformio] - Click ✓ to compile, connect via USB-C, click → to upload
Arduino
- Install Arduino IDE
- In Board Manager, search for
esp32and install esp32 by Espressif Systems - Copy library folders from the project
librariesdirectory to your Arduino libraries folder - Open the example
.inofile - In Tools → Board, configure:
| Arduino IDE Setting | Value |
|---|---|
| Board | ESP32S3 Dev Module |
| Upload Speed | 921600 |
| USB Mode | Hardware CDC and JTAG |
| USB CDC On Boot | Enabled |
| USB Firmware MSC On Boot | Disabled |
| USB DFU On Boot | Disabled |
| CPU Frequency | 240 MHz (WiFi) |
| Flash Mode | QIO 80 MHz |
| Flash Size | 16MB (128Mb) |
| Core Debug Level | None |
| Partition Scheme | 16M Flash (3MB APP/9.9MB FATFS) |
| PSRAM | OPI PSRAM |
| Arduino Runs On | Core 1 |
| Events Run On | Core 1 |
- Select the correct port and click Upload
If upload fails: hold BOOT, press RST, release RST, then click Upload.
Development Platforms
Video
Key Features
- ESP32-S3-WROOM-1: 16 MB Flash, 8 MB PSRAM, Wi-Fi + Bluetooth 5.0
- 4.7-inch ED047TC1 E-Ink display (960 × 540, 16-level grayscale), TPS65185 driver
- SX1262 LoRa (433–915 MHz)
- MIA-M10Q GNSS module
- GT911 capacitive touch (two-point, I²C)
- PCF85063 RTC, BQ25896 + BQ27220 battery management
- MagSafe magnetic charging + USB-C charging
- PCA9535PW I/O expander, 2 × QWIIC
Product Parameters
| Feature | Specification |
|---|---|
| MCU | ESP32-S3-WROOM-1 @ 240 MHz |
| Flash | 16 MB |
| PSRAM | 8 MB |
| Wi-Fi | 2.4 GHz 802.11 b/g/n |
| Bluetooth | Bluetooth 5.0 LE |
| LoRa | SX1262, 433–915 MHz |
| GPS | MIA-M10Q GNSS |
| Display | ED047TC1 4.7-inch E-Ink, 960 × 540, 16-level grayscale |
| Touch | GT911 capacitive, two-point, I²C (0x5D) |
| E-Ink Driver | TPS65185 (I²C 0x68) |
| Battery | 3.7 V 1500 mAh LiPo |
| Battery IC | BQ25896 (0x6B) + BQ27220 (0x55) |
| Charging | MagSafe + USB-C |
| RTC | PCF85063 (I²C 0x51) |
| I/O Expander | PCA9535PW (I²C 0x20) |
| Storage | TF card slot |
| USB | 1 × Type-C |
| Expansion | 2 × QWIIC |
| Buttons | RST + BOOT + IO48 + PWR |
| Mounting Holes | 2 × M4 |
| Dimensions | 129 × 69 × 11 mm |
Pin Diagram
Pin Mapping
#define BOARD_GPS_RXD       44
#define BOARD_GPS_TXD       43
#define BOARD_SCL           40
#define BOARD_SDA           39
#define BOARD_SPI_MISO      21
#define BOARD_SPI_MOSI      13
#define BOARD_SPI_SCLK      14
#define BOARD_TOUCH_INT     3
#define BOARD_TOUCH_RST     9
#define BOARD_RTC_IRQ       2
#define BOARD_SD_CS         12
#define BOARD_LORA_CS       46
#define BOARD_LORA_IRQ      10
#define BOARD_LORA_RST      1
#define BOARD_LORA_BUSY     47
#define BOARD_BL_EN         11
#define BOARD_PCA9535_INT   38
#define BOARD_BOOT_BTN      0
// E-Ink data pins: D0-D7 = GPIO5-8, 15-18
// E-Ink control: CKV=48, STH=41, LEH=42, STV=45, CKH=4
Dimension Diagram
Schematic
Datasheet
Software Development
Dependent Libraries
FAQ
Q. What's the difference between MagSafe and USB charging? A. MagSafe provides convenient magnetic attachment charging; USB is standard wired charging. Both can be used simultaneously.
Q. Upload fails? A. Hold BOOT, press and release RST, then click Upload.
Q. Arduino IDE prompts to upgrade libraries? A. Do not upgrade — stay with the versions tested with this project.
Version History
| Version | Hardware | Software | Notes |
|---|---|---|---|
| H752-01 | v1.0-241224 | v1.2_250118 | Latest — adds TPS65185, partial refresh, GPS |
| H752 | v1.0-240810 | v1.0-241203 | — |