T-Deck Plus Quick Start
Required Libraries
| Library | Version | Source |
|---|---|---|
| RadioLib | Latest | GitHub |
| LovyanGFX | Latest | GitHub |
| LilyGo-display-library | Latest | Xinyuan-LilyGO/LilyGo-display-library |
| TinyGPSPlus | Latest | GitHub |
| SensorLib | Latest | GitHub |
| LVGL | 8.4.0 | GitHub |
Do not upgrade libraries beyond the versions included in
T-Deck/lib/.
Arduino
PlatformIO (Recommended)
- Install VS Code and the PlatformIO IDE extension
- Clone the repository:bash
git clone https://github.com/Xinyuan-LilyGO/T-Deck.git - Open
platformio.iniand uncomment the example line you want to use (only one active at a time) - Click Build to build, connect via USB, click Upload to upload
Arduino IDE
1. Install ESP32 Board Support
- Open Arduino IDE -> File -> Preferences
- Add to "Additional Board Manager URLs":
https://raw.githubusercontent.com/espressif/arduino-esp32/gh-pages/package_esp32_index.json - Go to Tools -> Board -> Boards Manager, search
esp32, install esp32 by Espressif Systems
2. Install Libraries
Copy all folders from T-Deck/lib/ to your Arduino libraries directory.
3. Board Settings
| Setting | Value |
|---|---|
| Board | ESP32S3 Dev Module |
| Upload Speed | 921600 |
| USB Mode | Hardware CDC and JTAG |
| USB CDC On Boot | Enabled |
| CPU Frequency | 240 MHz |
| Flash Mode | QIO 80 MHz |
| Flash Size | 16 MB (128Mb) |
| Partition Scheme | 16M Flash (3MB APP/9.9MB FATFS) |
| PSRAM | OPI PSRAM |
4. Upload
Click Upload.
If upload fails: hold the trackball center button (BOOT), insert USB, then click Upload. Press RST to exit download mode.
Examples
| Example | Description |
|---|---|
Keyboard_T_Deck_Master | Read keyboard input from T-Deck |
Microphone | ES7210 microphone noise detection |
Touchpad | GT911 touchscreen coordinate reading |
GPSShield | GPS module (MIA-M10Q) example |
UnitTest | Full factory hardware test |
LVGL
T-Deck Plus uses an ST7789 TFT (320×240) with a GT911 capacitive touchscreen. LVGL 8.4.0 is included in the T-Deck/lib/ folder.
#include <LilyGo_TDeck.h>

void setup() {
  board.begin();
  board.display.fillScreen(TFT_BLACK);

  lv_init();
  // LVGL draw buffer and display driver are set up by the board library
  board.display.lvgl_begin();

  lv_obj_t *label = lv_label_create(lv_scr_act());
  lv_label_set_text(label, "T-Deck Plus");
  lv_obj_align(label, LV_ALIGN_CENTER, 0, 0);
}

void loop() {
  lv_timer_handler();
  delay(5);
}
Peripheral Examples
Display (ST7789)
#define LILYGO_LGFX_USE_T_DECK_PLUS
#include <LilyGo_LovyanGFX.h>

LilyGo_T_Deck_Plus display;

void setup() {
  display.begin(1);
  display.setTextColor(TFT_WHITE, TFT_BLACK);
  display.setTextSize(2);
  display.drawString("T-Deck Plus", 80, 110);
}

void loop() {}
LoRa (SX1262)
#include <SPI.h>
#include <RadioLib.h>

#define BOARD_POWERON      10
#define RADIO_CS_PIN        9
#define RADIO_DIO1_PIN     45
#define RADIO_RST_PIN      17
#define RADIO_BUSY_PIN     13
#define BOARD_SPI_MOSI     41
#define BOARD_SPI_MISO     38
#define BOARD_SPI_SCK      40
#define BOARD_TFT_CS       12
#define BOARD_SDCARD_CS    39

SX1262 radio = new Module(RADIO_CS_PIN, RADIO_DIO1_PIN, RADIO_RST_PIN, RADIO_BUSY_PIN);

void setup() {
  Serial.begin(115200);

  // Enable the peripheral power rail used by the LoRa module.
  pinMode(BOARD_POWERON, OUTPUT);
  digitalWrite(BOARD_POWERON, HIGH);
  delay(200);

  // LoRa, TFT, and SD share SPI. Release the other devices before using LoRa.
  pinMode(BOARD_TFT_CS, OUTPUT);    digitalWrite(BOARD_TFT_CS, HIGH);
  pinMode(BOARD_SDCARD_CS, OUTPUT); digitalWrite(BOARD_SDCARD_CS, HIGH);
  pinMode(RADIO_CS_PIN, OUTPUT);    digitalWrite(RADIO_CS_PIN, HIGH);

  SPI.begin(BOARD_SPI_SCK, BOARD_SPI_MISO, BOARD_SPI_MOSI, RADIO_CS_PIN);

  int state = radio.begin(915.0, 125.0, 7, 5, RADIOLIB_SX126X_SYNC_WORD_PRIVATE, 22);
  if (state != RADIOLIB_ERR_NONE) {
    Serial.print("Radio init failed: "); Serial.println(state);
    while (true);
  }
  Serial.println("SX1262 ready");
}

void loop() {
  int state = radio.transmit("Hello T-Deck Plus");
  if (state == RADIOLIB_ERR_NONE) Serial.println("Sent OK");
  delay(2000);
}
GPS (MIA-M10Q)
#include <TinyGPSPlus.h>

TinyGPSPlus gps;
// GPS on Serial1: RX=21, TX=48, 38400 baud
HardwareSerial gpsSerial(1);

void setup() {
  Serial.begin(115200);
  gpsSerial.begin(38400, SERIAL_8N1, 21, 48);
}

void loop() {
  while (gpsSerial.available()) gps.encode(gpsSerial.read());
  if (gps.location.isUpdated()) {
    Serial.printf("Lat: %.6f Lng: %.6f\n",
      gps.location.lat(), gps.location.lng());
  }
}
Important Notes
- The Grove interface pins on T-Deck Plus are allocated to the GPS module; they cannot be used as a general-purpose connector.
- When powered by battery, GPIO10 must be set HIGH.
- The LoRa SX1262 shares the SPI bus keep all other SPI device CS lines HIGH before communicating with it.
FAQ
Q: Upload keeps failing?
A: Hold the trackball center button (BOOT), insert USB, then click Upload.
Q: Does T-Deck Plus have a touchscreen?
A: Yes. T-Deck Plus has a GT911 capacitive touchscreen and also supports trackball navigation. The standard T-Deck does not have a touchscreen.
Q: Screen display looks wrong?
A: T-Deck updated the ST7789 initialization sequence on 2024-07-26. Make sure your library matches the current repo version.
Q: What should I do if LoRa initialization shows Radio init failed: -2?
A: This usually means the sketch cannot detect the SX1262. Before initializing LoRa, set GPIO10 HIGH and pull the other SPI device CS pins HIGH, such as TFT_CS=12 and SD_CS=39. Also confirm that the sketch uses the T-Deck Plus LoRa pins: CS=9, DIO1=45, RST=17, BUSY=13.
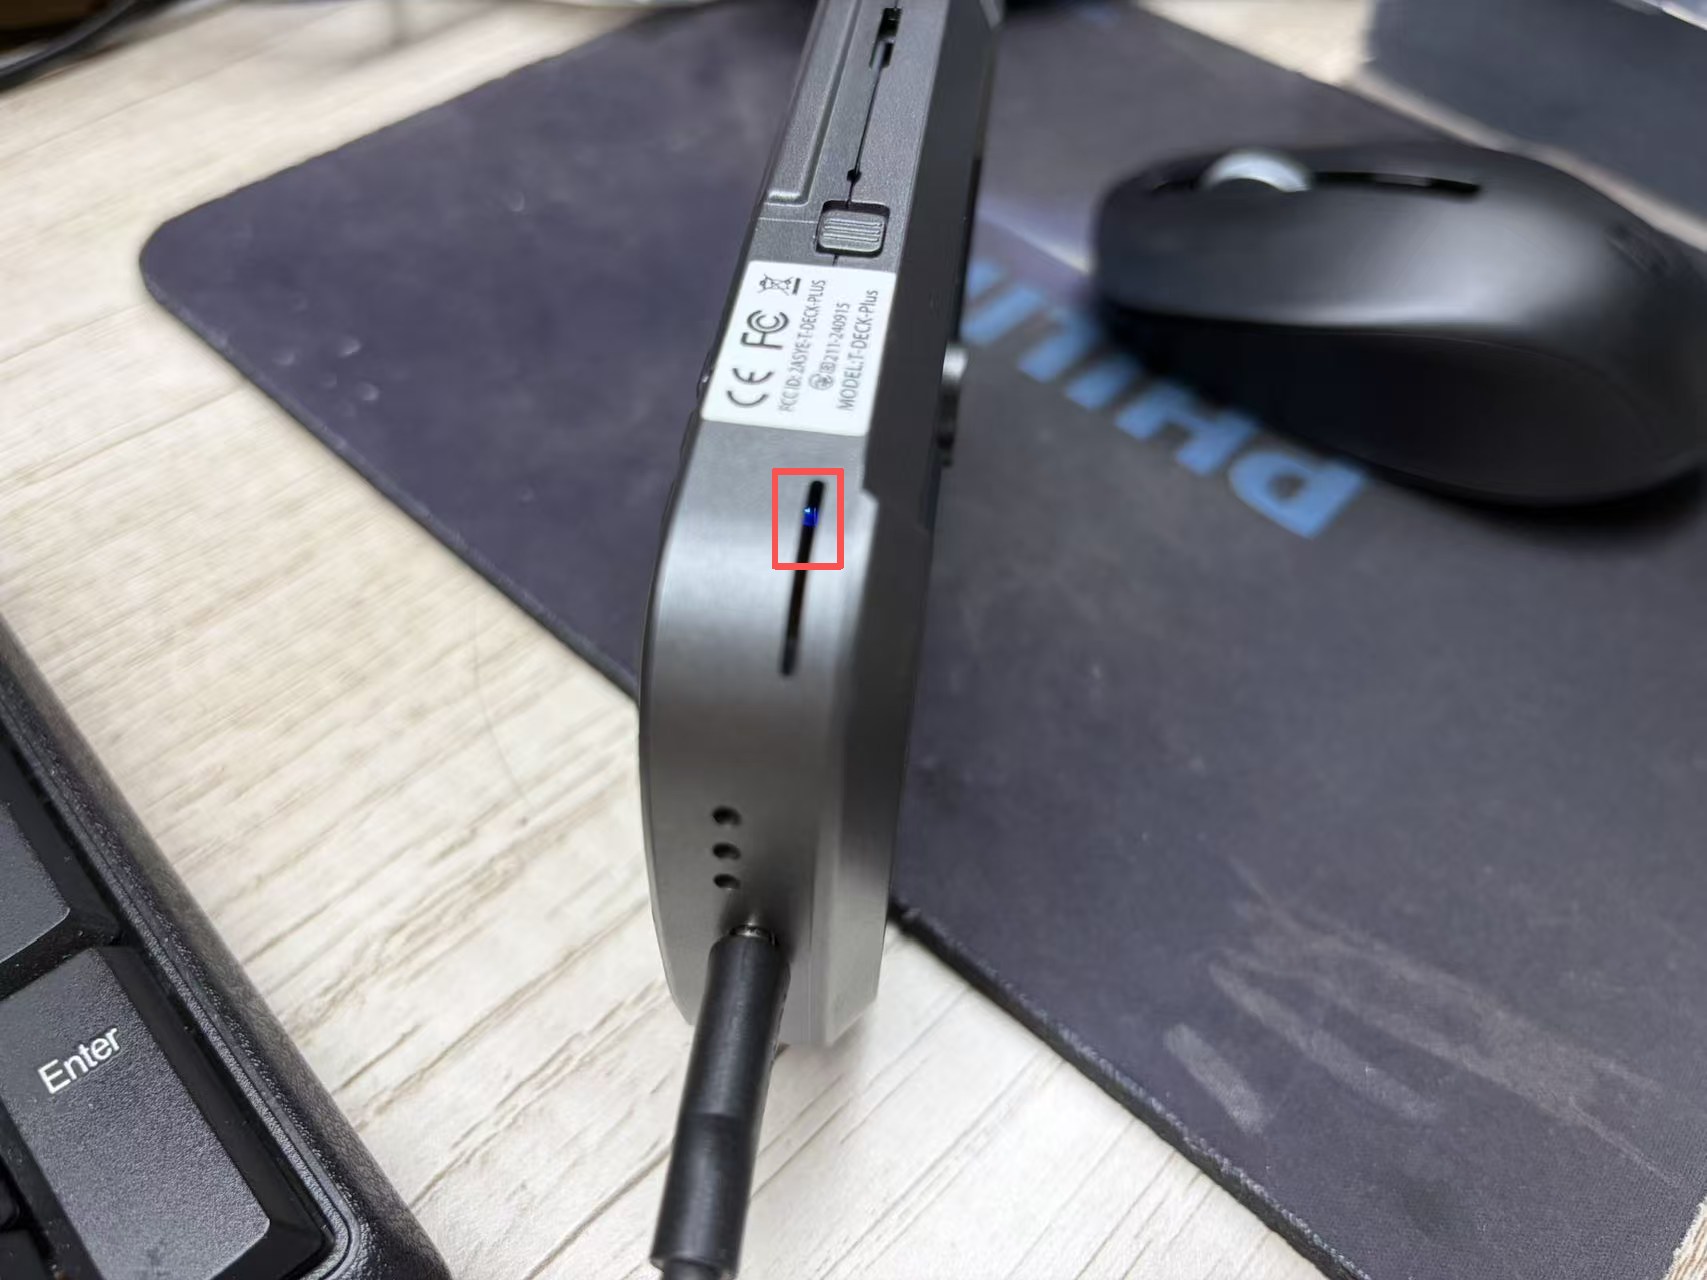
Q: How can I tell whether T-Deck Plus is charging or fully charged?
A: Connect USB and check the blue charging indicator from the bottom side of the device. A lit blue LED means the battery is charging; when the blue LED turns off, the battery is fully charged. This is a quick way to confirm that the device can charge to full.